Ah, the sourdough starter. So simple, and yet, all consuming. In recent years, more people are attempting to make their own bread easily without yeast [1], and while sourdough starter only requires two ingredients [2], flour and water, it's still a process that needs a little finessing and a lot of patience. (If only I had known on that sunny spring day when I threw together some flour and water in the only large jar I owned and stuck it on the windowsill.)
Thankfully, I can now share my experience and insights after documenting my sourdough starter day by day; please learn from my mistakes and incessant googling all through the night and persevere until you have a crusty and delicious loaf of bread at the end of this. And if not? Well, there's no shame in store-bought.
Let's take a yeast journey, shall we?

Sourdough Starter Day 1
Sourdough Starter Recipes
First, let's get this out of the way. There are as many sourdough starter recipes as there are humans making sourdough starter. This is both good and bad. It's good because there's a lot of wiggle room, and if you need to adjust the ratios of ingredients along the way, that's totally OK; you can make a successful sourdough starter without following some magic formula. It's bad because there is no magic formula.
Your recipe may depend on a number of factors like the type of flour you use and the temperature of your house, and it requires constant monitoring and adjusting and going with your gut.
For my starter, I started off using a recipe from Food 52 [4], but eventually, I switched to a recipe from The Perfect Loaf [5].
That said, here's a basic sourdough starter recipe to get started below.
- Combine 1 cup of whole wheat flour and 1/2 cup cool water in a jar or container at least a quart large. (Make sure there's enough room for the starter to grow over time.)
- Loosely cover the container and leave in a room temperature for one day.
- Continue feeding the starter and follow the subsequent steps ahead.
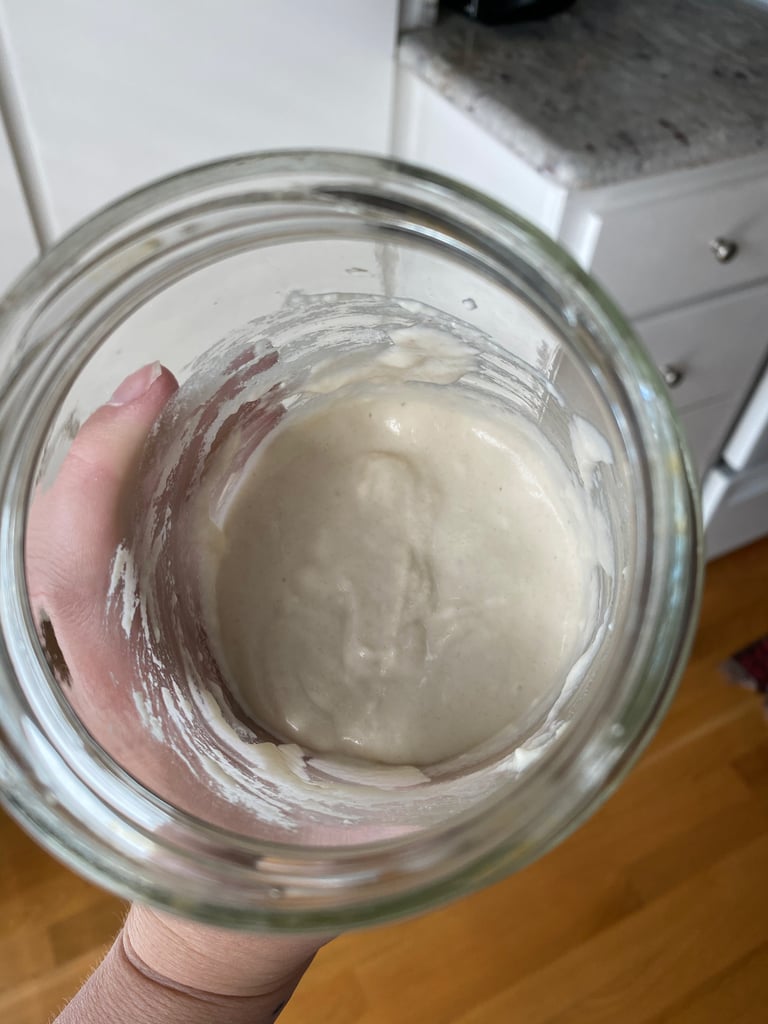
Sourdough Starter Day 1
- On day one, I mixed 1/2 cup all-purpose flour and 6 tablespoons filtered water in a large glass jar, covered it with a tea towel, and set it in a plastic container (in case of overflow) in the only spot in my house that somewhat consistently stays in the 70-80 degree range.
Sourdough Starter Day 1
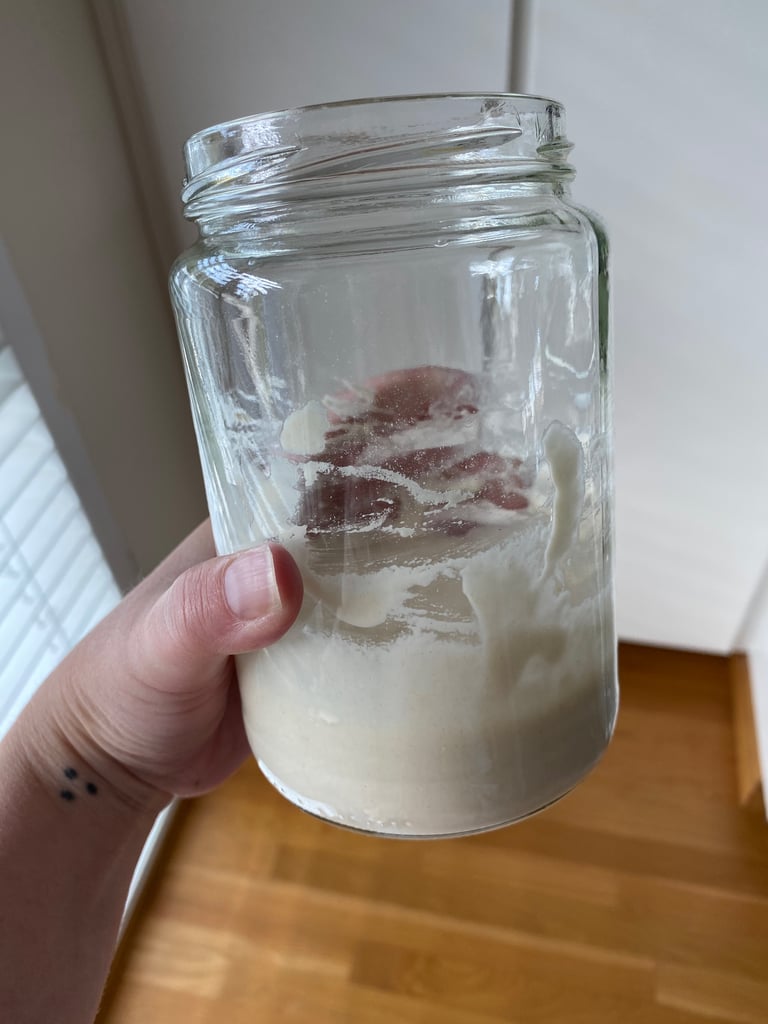
It's helpful to put a rubber band on the jar to mark where the sourdough starter is so you can see how much it rises and falls throughout the day.
Here are some other notes on tools and ingredients.
- I used all-purpose flour, which as you'll see in the coming photos wasn't ideal and slowed down my progress immensely. Most recipes recommend using rye or whole-wheat flour, which I eventually switched to, and it made a big difference.
- It's important to use filtered water, as chlorine can kill or slow down your starter (you can also leave tap water sitting out overnight). Use cold water if your home is on the warm side, and use room temperature water if your home is on the cool side.
- A glass jar with straight sides is easier to clean and important so you can see the starter activity. Cover it with a tea towel or lid loosely sitting on top of it; you want to prevent critters or debris falling in it, but it needs air flow.
- A silicone spatula is helpful for mixing the starter and scraping the sides of the jar (plus it's easy to clean).
- A kitchen scale makes things easier and more precise. I didn't have one until the end of the process, so I'm putting the measurements in here in cups to start.
Sourdough Starter Day 2
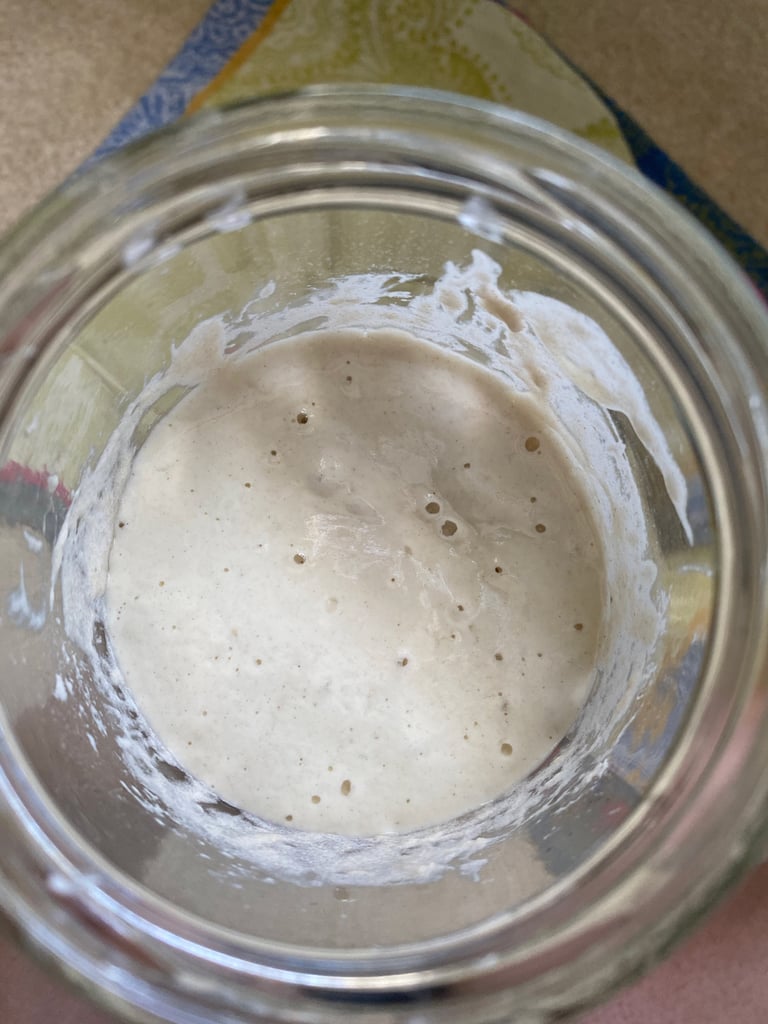
- In the morning of day 2, I stirred the starter, discarded half, and fed it 1/2 cup all-purpose flour and 6 tablespoons filtered water, mixing it up so there was no dry flour left.
The second day is when I got cocky and learned a valuable lesson. Using 100-percent all-purpose flour (which was the only kind I had on hand) was a mistake. It encouraged "bad bacteria" that made the starter look like it was an overachiever, getting bubbly and active and even doubling in size by the afternoon (which usually doesn't happen for multiple days).
Warning: this is a false start that actually prolonged my starter growth in the long run.
Sourdough Starter Day 2
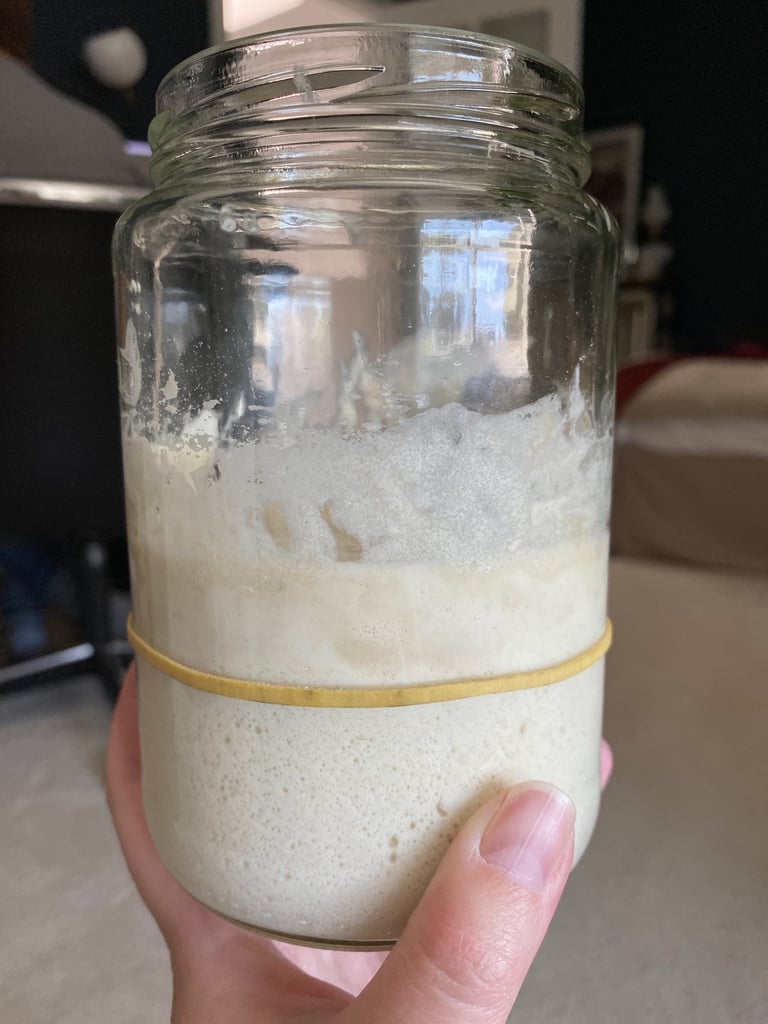
- In the evening of day 2, I stirred the starter, discarded half, and fed it 3/4 cup all-purpose flour and 1/2 cup plus 1 tablespoon filtered water, mixing it up so there was no dry flour left.
By the afternoon of the second day, the sourdough starter started smelling really bad. I'm not going to sugarcoat it, I had to hold my nose to feed it for the next few days — it was terrible.
I should have started using rye or whole wheat at this point, but I didn't because I was worried about switching flours. Don't make the same mistake I did.
Instead, I started stirring it throughout the day (something I read would help with the smell), and feeding it twice a day (every eight to 12 hours). I would also thoroughly clean the jar before every feeding.
Sourdough Starter Day 3
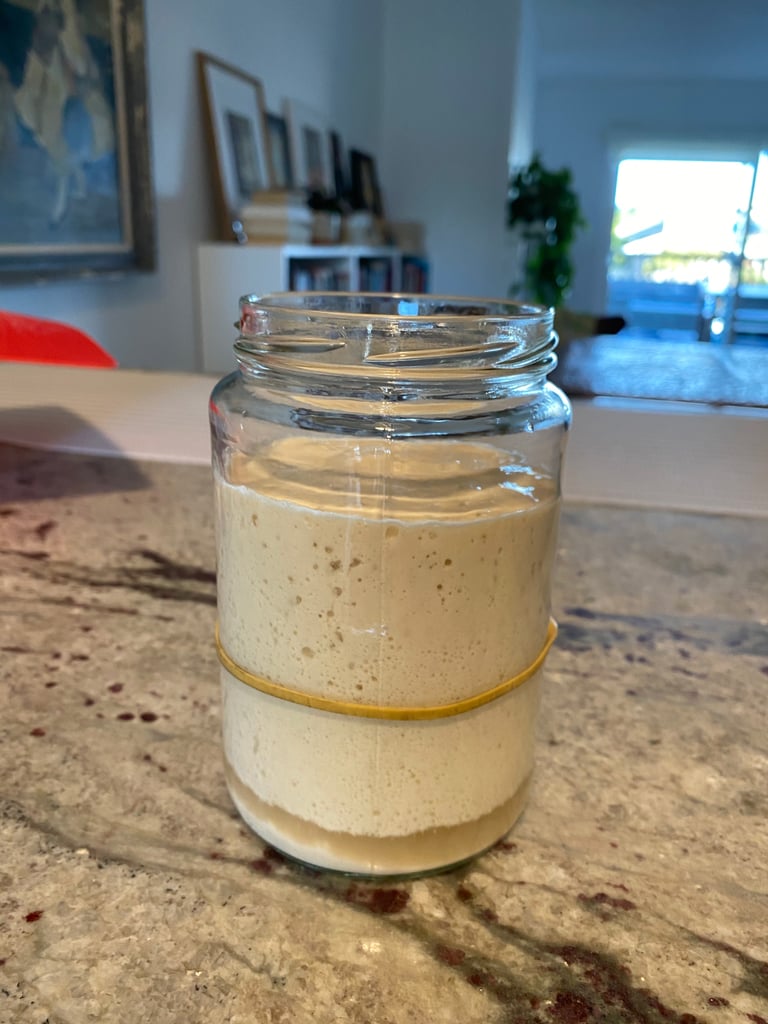
- In the morning on day 3, I stirred the starter and discarded half (around 4 ounces).
- I fed it 4 ounces of all-purpose flour (3/4 cup + 2 tablespoons) and 4 ounces filtered water (1/2 cup), mixing it up so there was no dry flour left.
As you can see, the sourdough starter more than doubled in size on day three, with "hooch" on the bottom. (It also still smelled terrible.) Hooch is a clear-to-dark-colored liquid that can collect at the top or the bottom of your starter when it's hungry and needs a feeding. It's normal and not a sign it's gone bad or moldy.
Watch out for a pink or orange tint or streak, however, as this is actually a sign that your sourdough starter has gone bad [6] and should be tossed.
Sourdough Starter Day 3
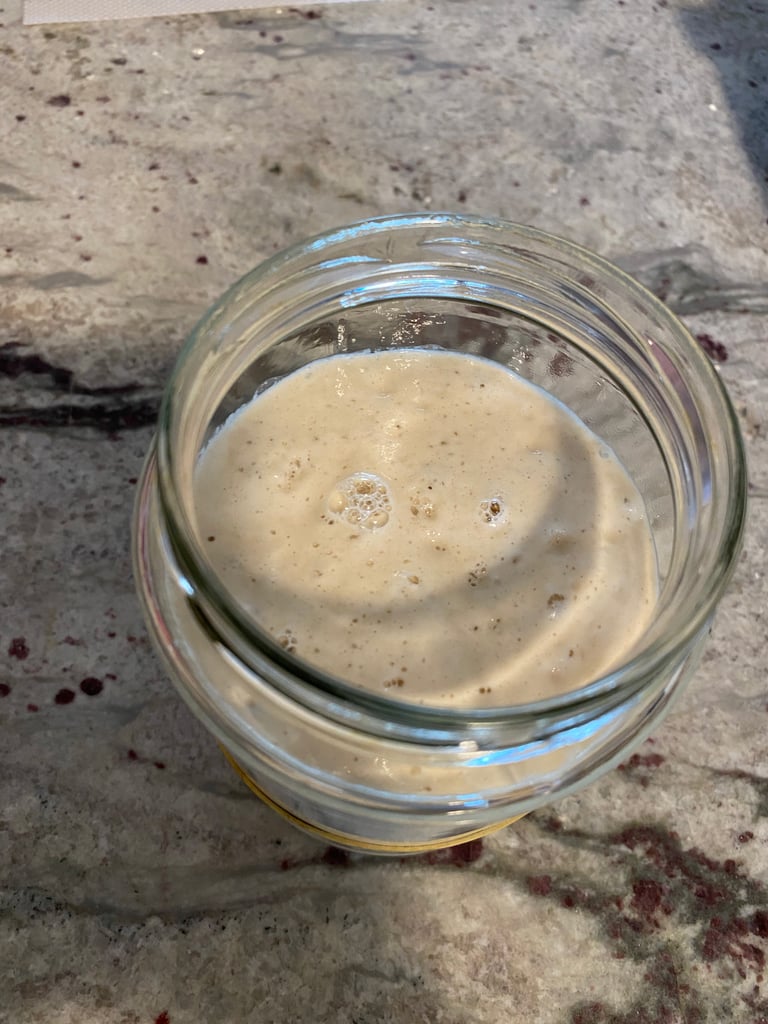
This is what the top looked like in the morning of day three before it was fed. When you stir a starter that has risen up like this, it'll deflate and have a light, airy "honeycomb" texture. (But just remember, this isn't a strong starter yet, it still has the smelly bacteria making it look like this.)
What you're aiming for, eventually, is a predictable rise and fall every eight to 12 hours. You want to feed it "at the top," or just when you see streaks that show it's starting to fall. That's when you know you're on the right track.
Sourdough Starter Day 3
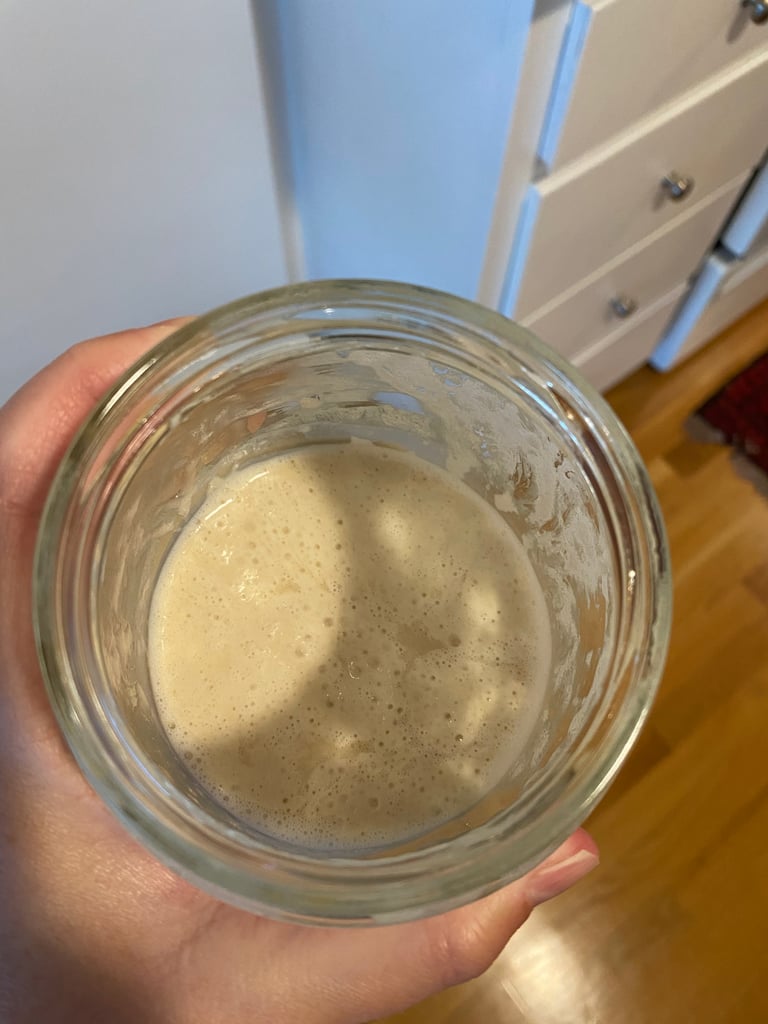
- In the evening of day 3, I stirred the starter, discarded half (around 4 ounces), and fed it 4 ounces all-purpose flour (3/4 cup + 2 tablespoons) and 4 ounces filtered water (1/2 cup), mixing it up so there was no dry flour left.
As you can see, this is what the hooch looks like on on the top of the starter. This was at night on the third day before I fed it.
One thing I learned through this process is that you don't necessarily need to stick to an exact schedule. You should follow the signs the starter is giving you for when it's hungry, and then adjust as needed to speed up or slow down the starter to fit your schedule. Visible hooch, a sweet apple/pear smell, or a nail polish remover smell are all signs it should be fed.
Sourdough Starter Day 4
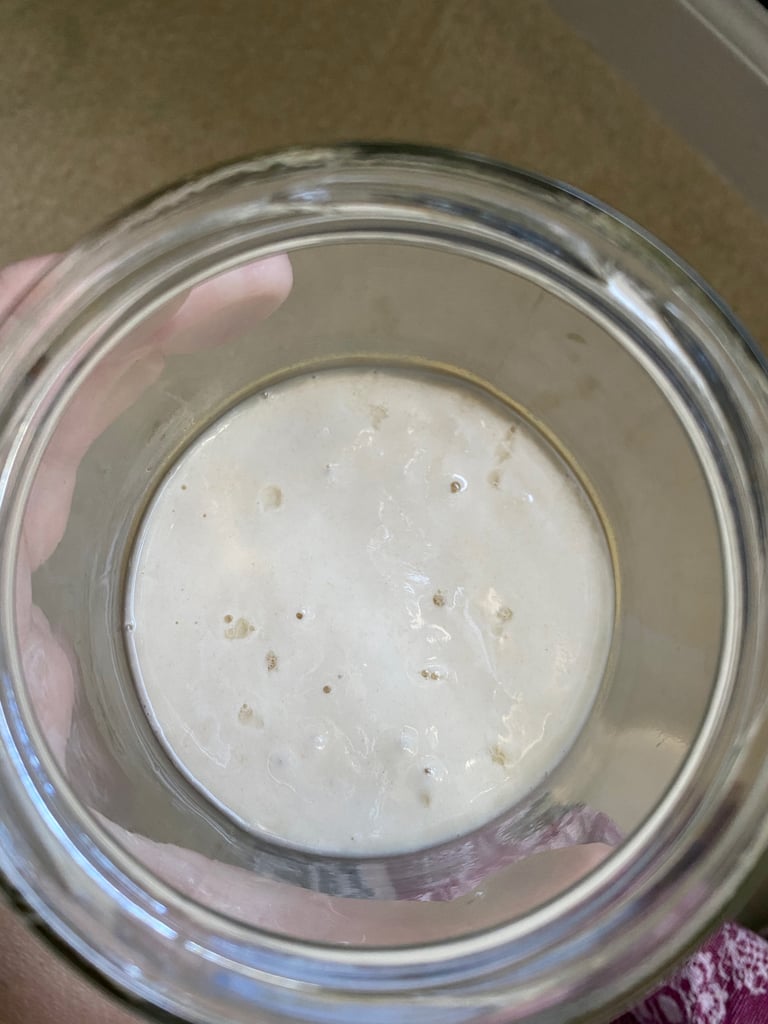
- In the morning of day 4, I stirred the starter, discarded half (around 4 ounces), and fed it 4 ounces all-purpose flour (3/4 cup + 2 tablespoons) and 4 ounces filtered water (1/2 cup), mixing it up so there was no dry flour left.
- In the evening of day 4, I stirred the starter, discarded half (around 4 ounces), and fed it 4 ounces all-purpose flour (3/4 cup + 2 tablespoons) and 4 ounces filtered water (1/2 cup), mixing it up so there was no dry flour left.
On the fourth day, activity was starting to die down and the starter was thickening up. The smell, unfortunately, was still awful.
Sourdough Starter Day 5
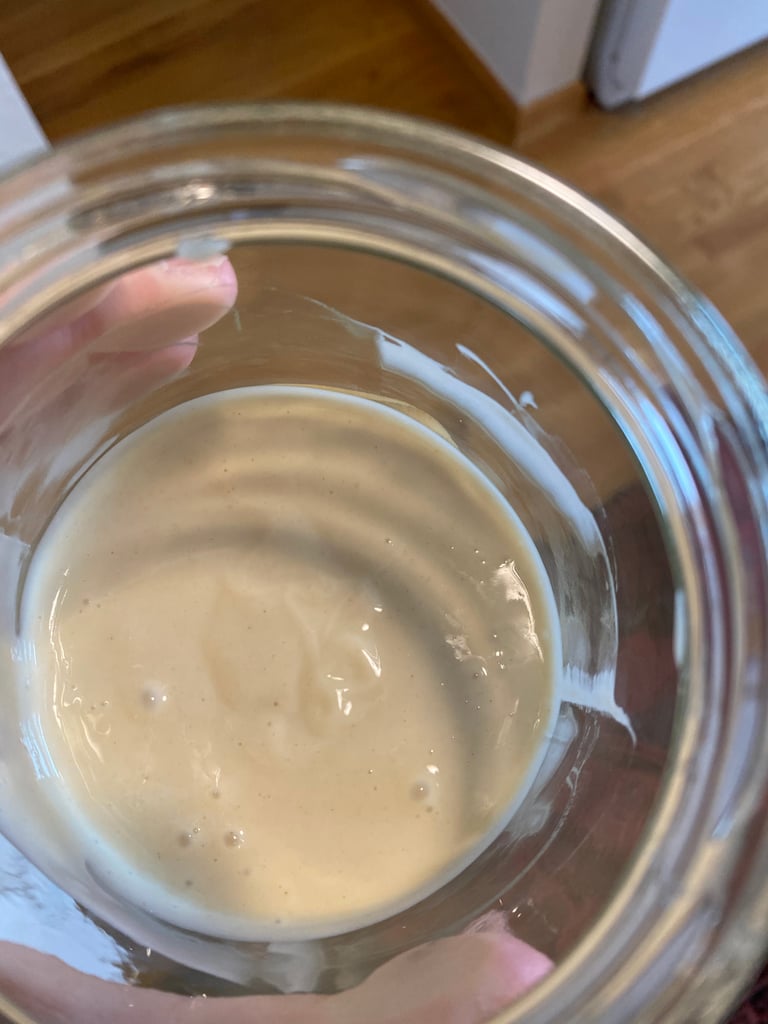
- On day 5, I stirred the starter, discarded half (around 4 ounces), and fed it 1/2 cup all-purpose flour and 1/4 cup filtered water, mixing it up so there was no dry flour left.
Since the (still smelly) starter had slowed way down in terms of activity, I only fed it every 24 hours starting on the fifth day. I also tweaked my measurements slightly based on yet another sourdough starter recipe.
Sourdough Starter Day 6
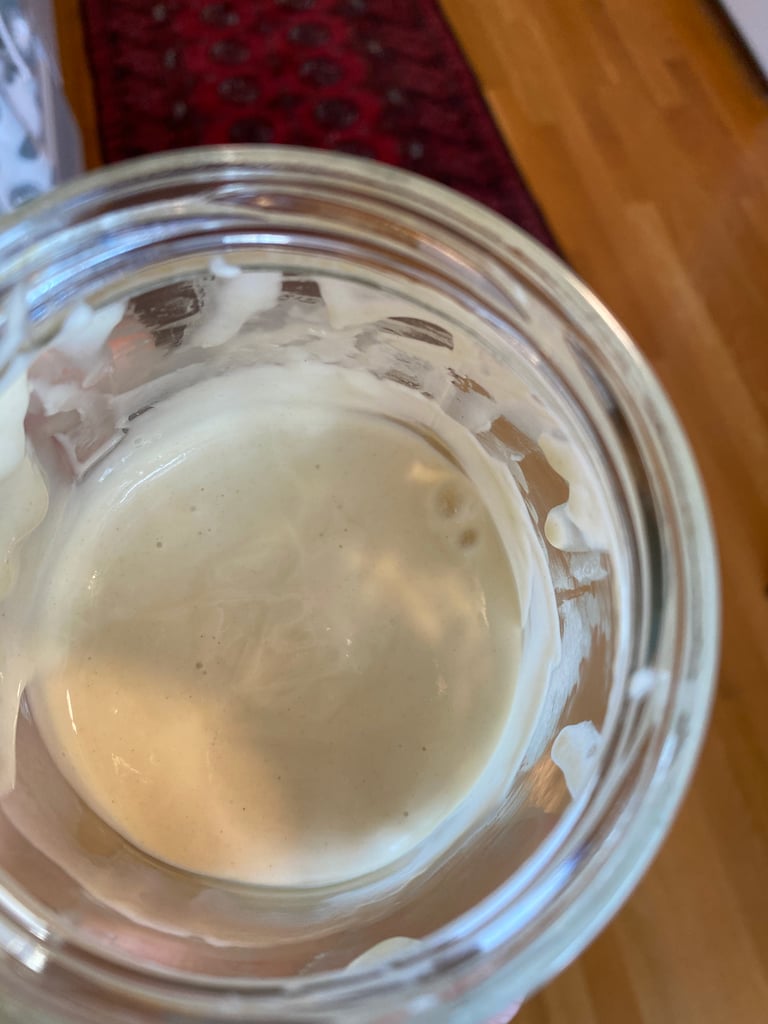
- On day 6, I stirred the starter, discarded half (around 4 ounces), and fed it 1/2 cup all-purpose flour and 1/4 cup filtered water, mixing it up so there was no dry flour left.
By the sixth day, the smell was still bad, but not as strong.
Sourdough Starter Day 7
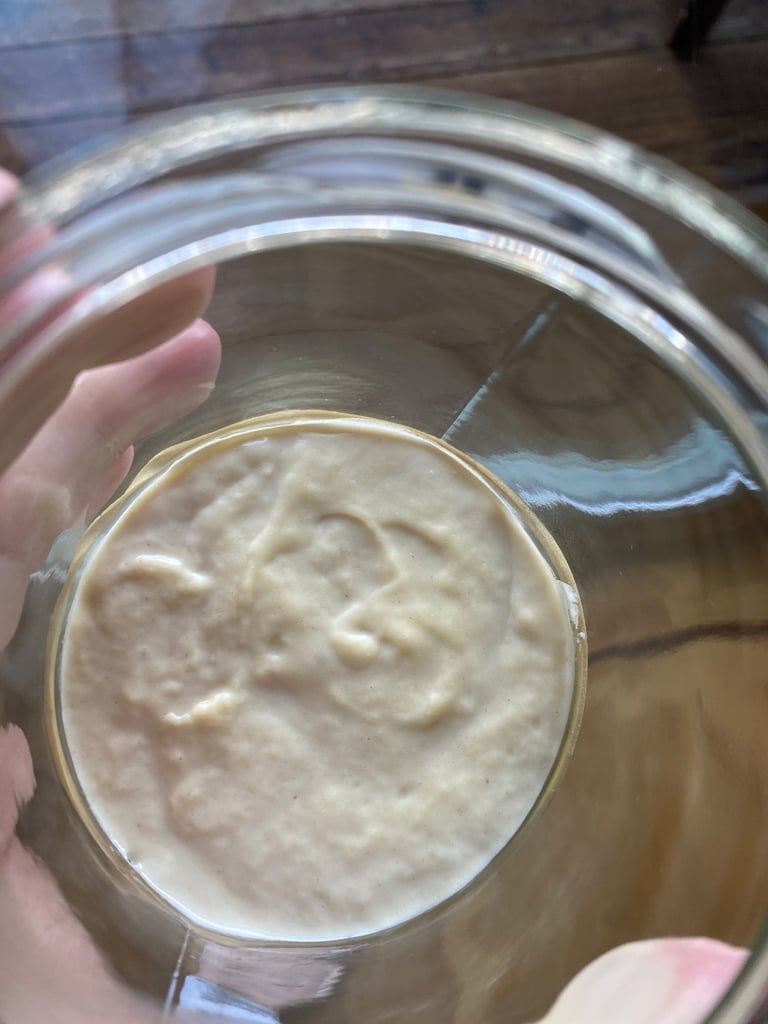
- On day 7, I stirred the starter, discarded half (around 4 ounces), and fed it 1/2 cup white-wheat flour and 1/4 cup filtered water, mixing it up so there was no dry flour left.
By the seventh day, the sourdough starter pretty much looked like it had regressed back to day 1. I decided to try switching to white-wheat flour (not whole wheat yet, since I had a hard time finding it at the store).
Sourdough Starter Day 8
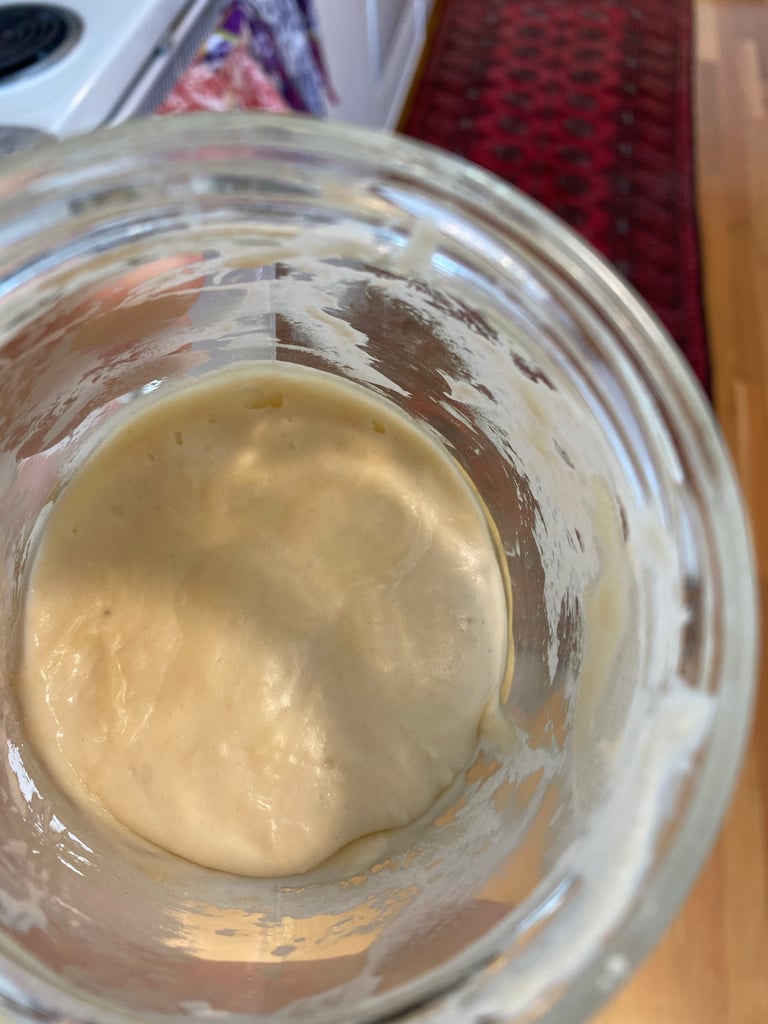
- On day 8, I stirred the starter, discarded half (around 4 ounces), and fed it 1/2 cup white-wheat flour and 1/4 cup filtered water, mixing it up so there was no dry flour left.
On the eighth day, it had a slight crust on the top before being fed, and this was the first day (finally) that it started to smell sour, like bread! Honestly, I can't even tell you how relieved I was for the horrific smell to be gone.
Sourdough Starter Day 9
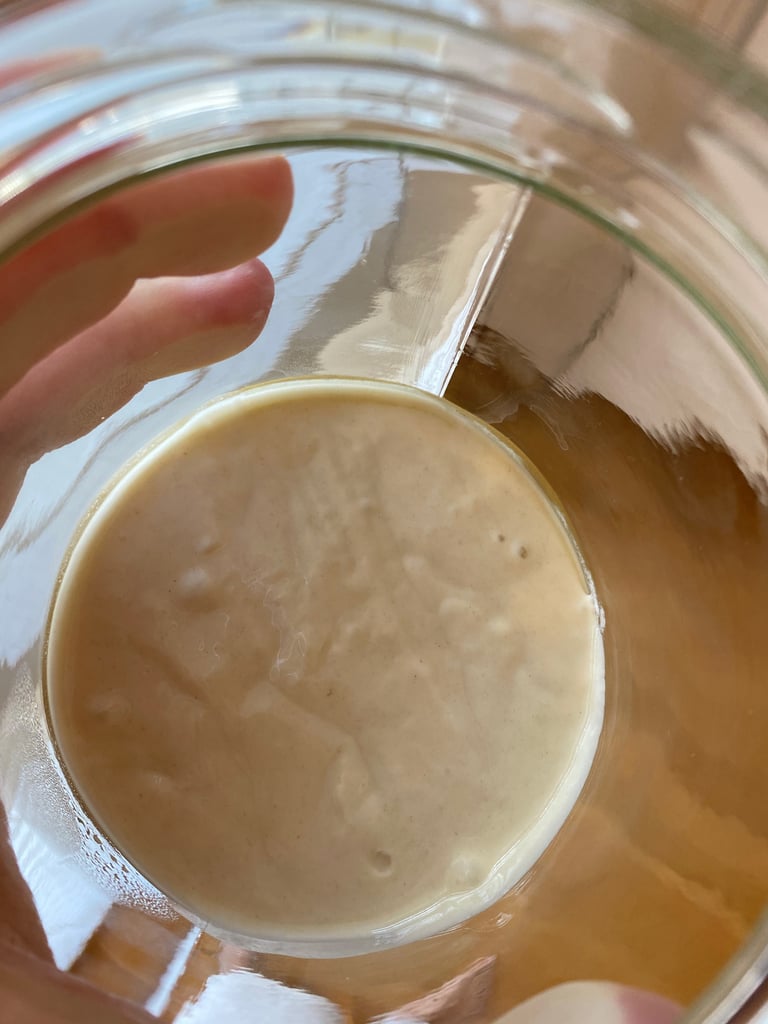
- On day 9, I stirred the starter, discarded half (around 4 ounces), and fed it 1/2 cup white-wheat flour and 1/4 cup filtered water, mixing it up so there was no dry flour left.
Let's talk about sourdough starter discard: around the time the sourdough starter began smelling like something edible, I decided to start saving the discard in a sealed container I kept in the fridge. I've since been on a roll using this discard in a number of recipes, including pancakes, flatbread, and even chocolate chip cookies.
Sourdough Starter Day 10
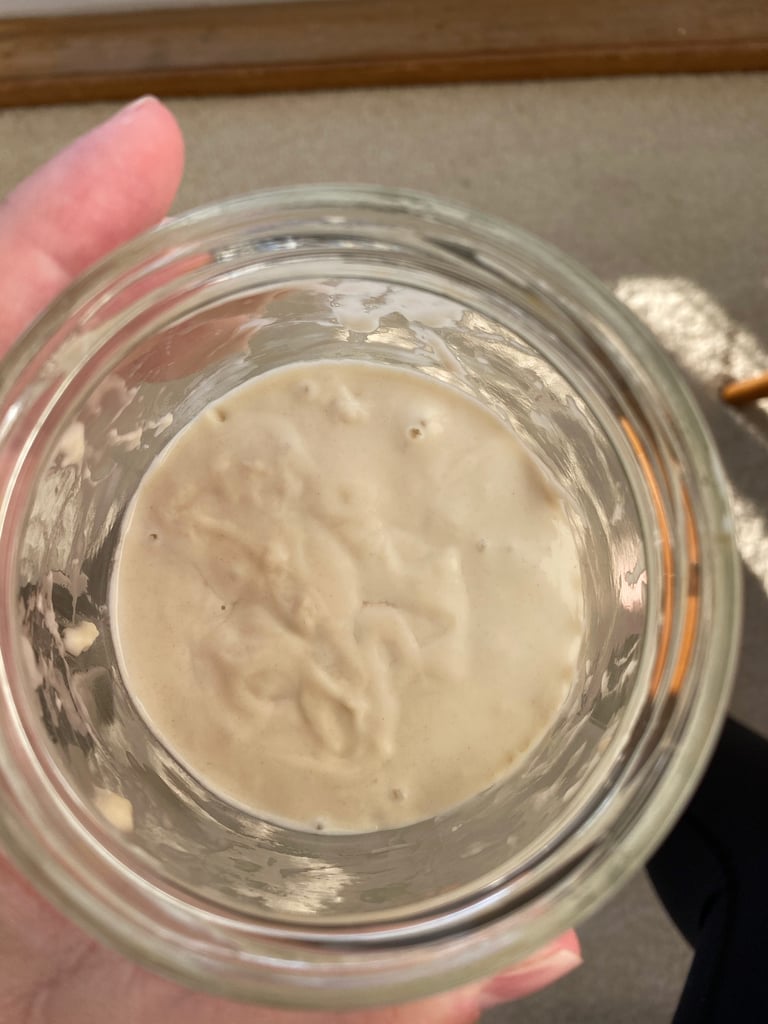
- On day 10, I stirred the starter, discarded half (around 4 ounces), and fed it 1/2 cup white-wheat flour and 1/4 cup filtered water, mixing it up so there was no dry flour left.
After several days of minimal activity, day 10 was when the sourdough starter finally started coming back to life with bubbles and rise.
Sourdough Starter Day 10
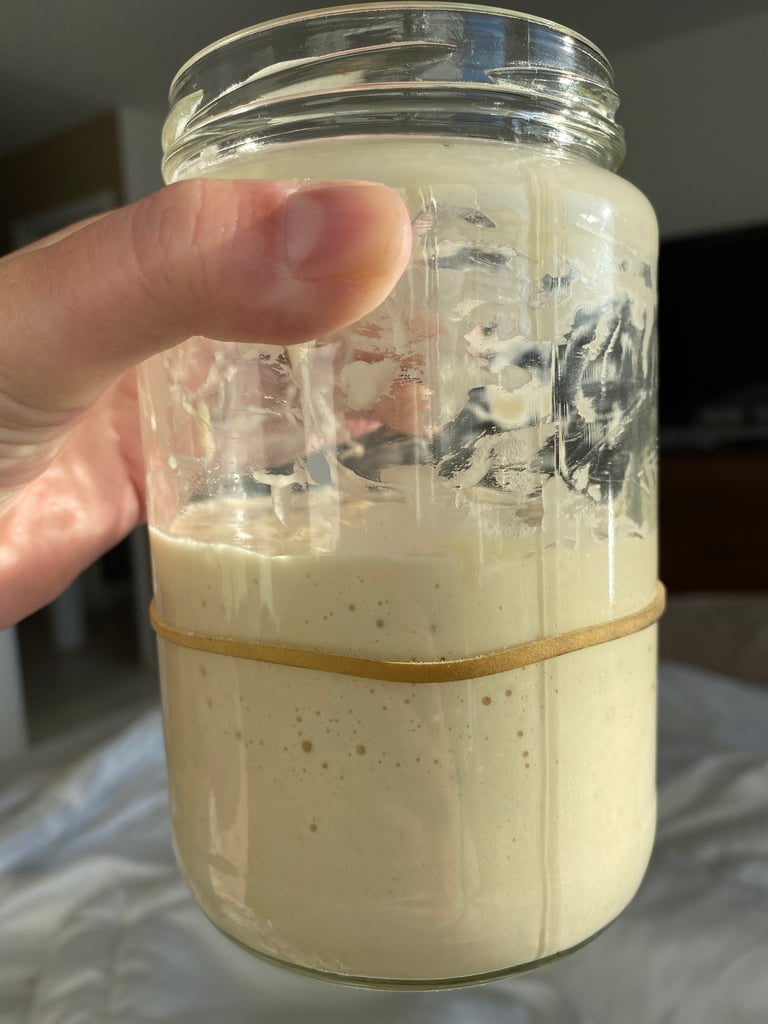
The smell also totally changed to sweet apples and pears — a welcome change from its early stinky days. According to the internet, this means it's hungry, but it has kept this smell pretty much consistently ever since.
Sourdough Starter Day 11
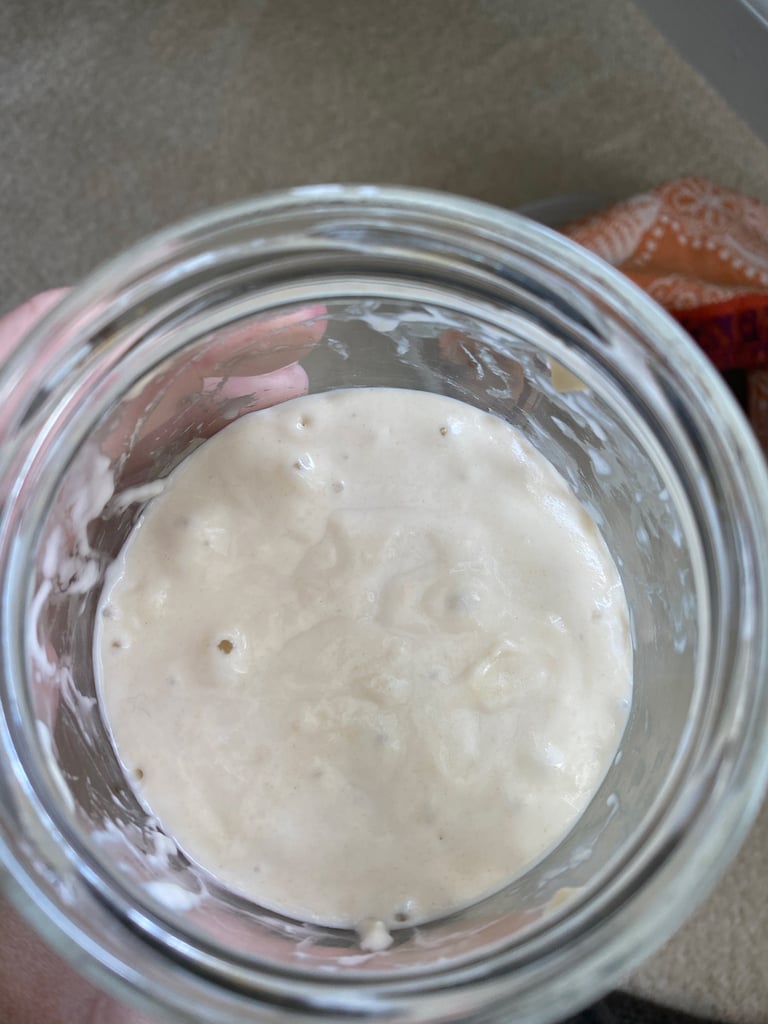
- On day 11, I stirred the starter, discarded half (around 4 ounces), and fed it 1/2 cup white-wheat flour and 1/4 cup filtered water, mixing it up so there was no dry flour left.
Sourdough Starter Day 11
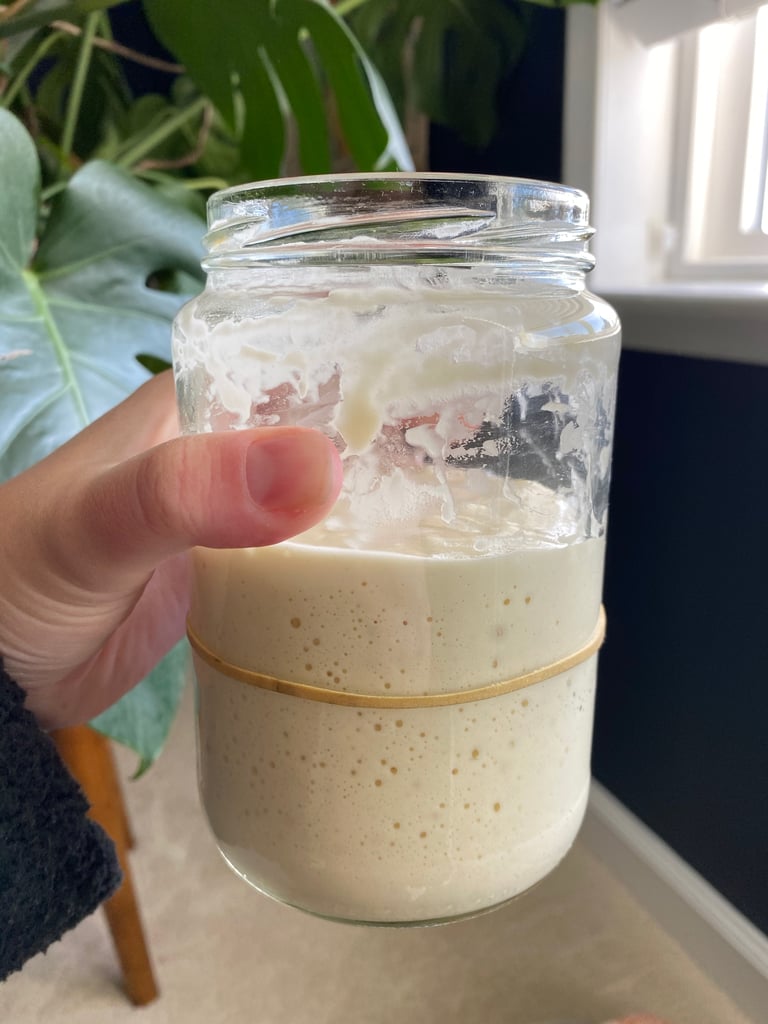
Finally seeing more consistent rise, with a thinner, more honeycomb-like texture.
Sourdough Starter Day 12
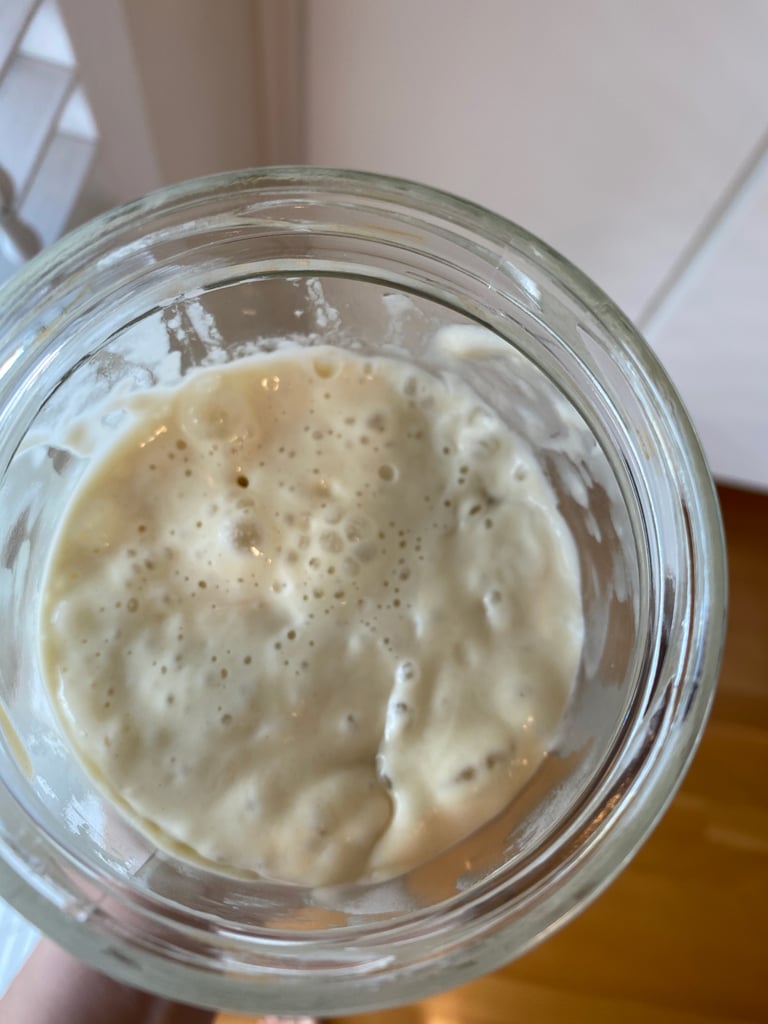
- On day 12, I stirred the starter, discarded half (around 4 ounces), and fed it 1/2 cup white-wheat flour and 1/4 cup filtered water, mixing it up so there was no dry flour left.
Sourdough Starter Day 12
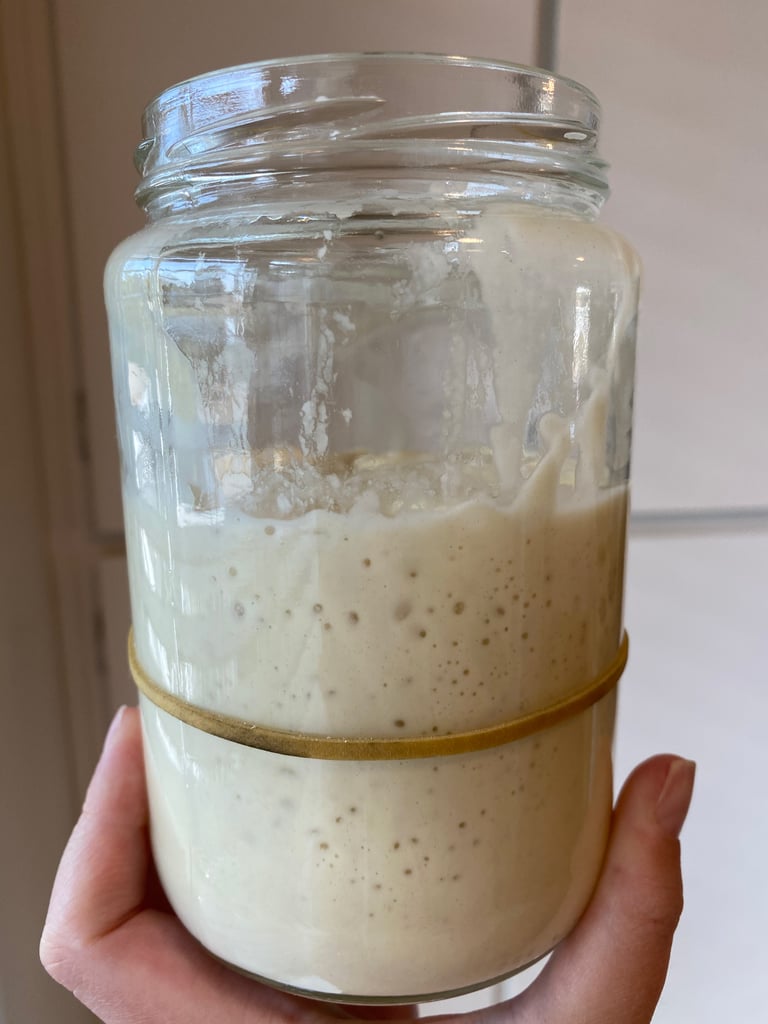
Good rise and a hint of a sour edge to the sweet apples and pears scent.
Sourdough Starter Day 13
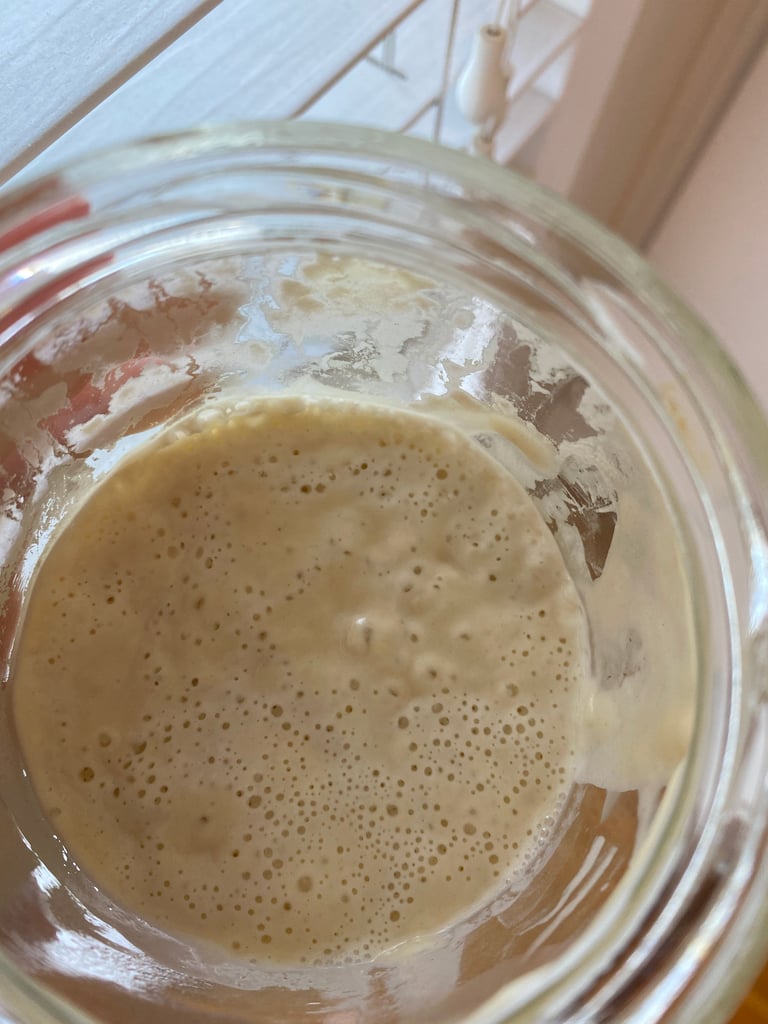
- On day 13, I stirred the starter, discarded half (around 4 ounces), and fed it 1/2 cup white-wheat flour and 1/4 cup filtered water, mixing it up so there was no dry flour left.
Sourdough Starter Day 13
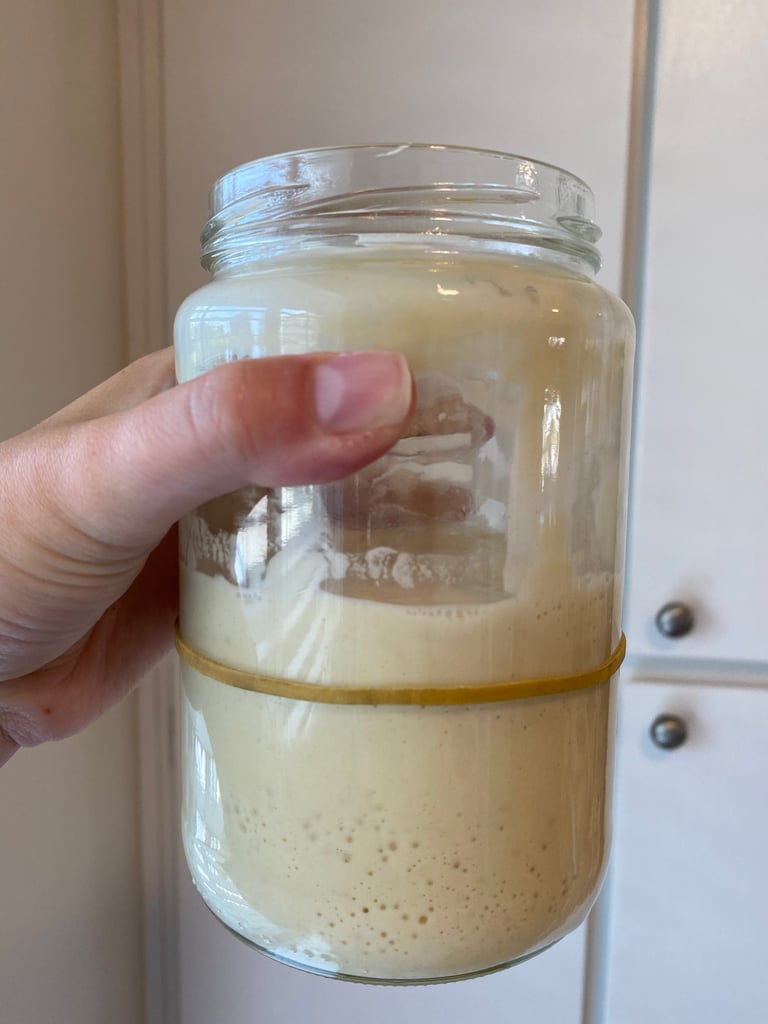
Didn't get as much height on day 13, but I adjusted its placement in the house and started covering it with an extra towel to keep it dark and warm. A couple of my bread-making friends suggested I should keep it out of direct sunlight.
Another suggestion that I found helpful was to have a lid or plate on top of your jar, not just a tea towel. I put a heavier plate on my jar on day 8 that may have helped, but with unpredictable house temperatures, it's hard to know for sure.
Sourdough Starter Day 14
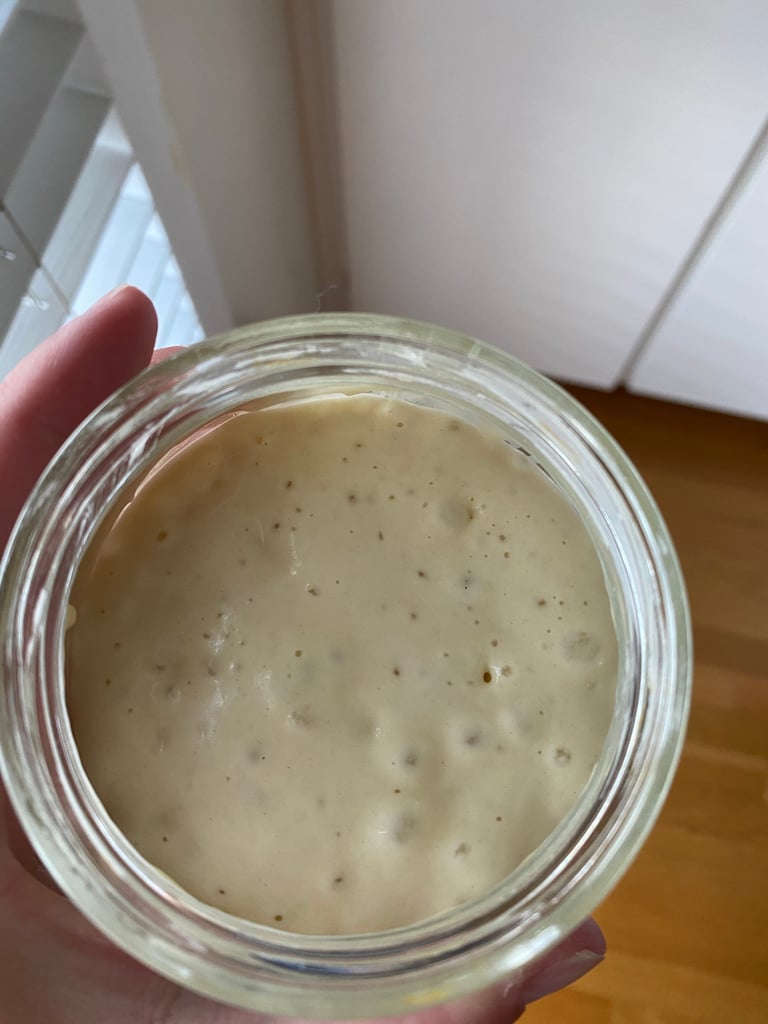
- In the morning of day 14, I stirred the starter, discarded half (around 4 ounces), and fed it 1/2 cup white-wheat flour and 1/4 cup filtered water, mixing it up so there was no dry flour left.
After two weeks, we were finally in business. By the afternoon, the starter had more than doubled (almost at the top of the jar) and was bubbly and smelling more yeasty.
Sourdough Starter Day 14
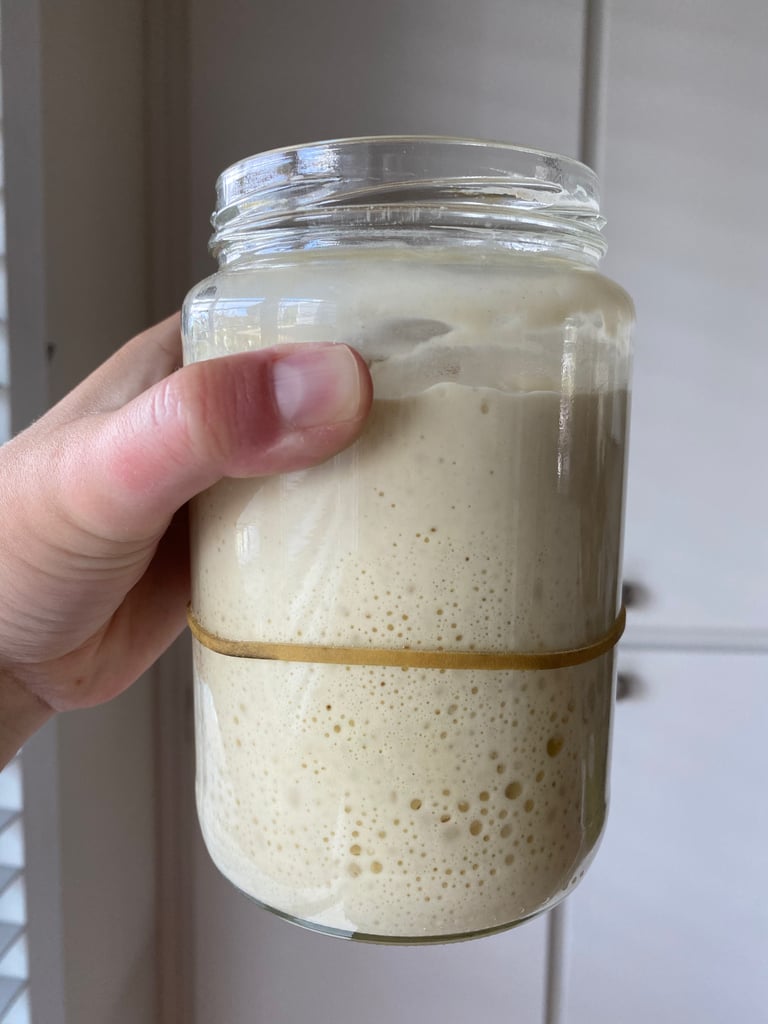
- In the evening of day 14, I stirred the starter, discarded all but 40 grams, and fed it 80 grams of whole wheat flour and 80 grams filtered water, mixing it up so there was no dry flour left.
Since my sourdough starter was rising and falling more predictably, actively bubbly, and smelling good, I decided to prep it for making a focaccia recipe the next day. I simply adjusted the ratios to create a "levain" (aka "leaven") that would be big enough to use in my recipe.
This was also the day I finally started using a kitchen scale (so measurements are in grams from now on) and the day I finally started using whole-wheat flour to give the starter a boost ahead of bread making.
Sourdough Starter Day 15
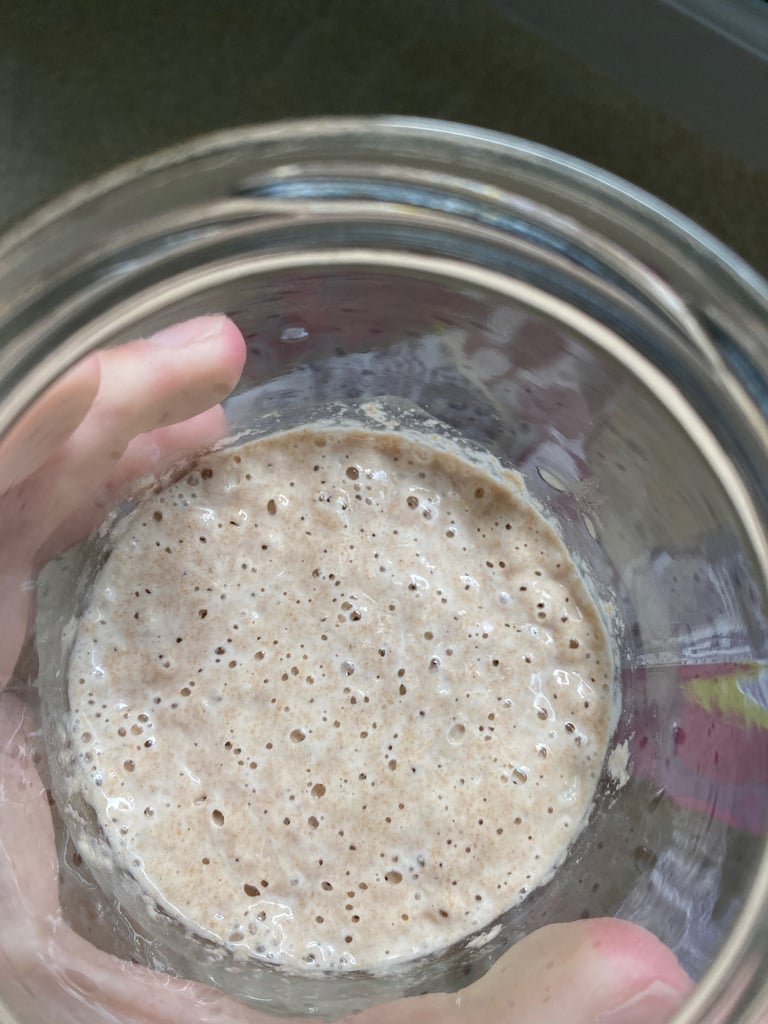
- In the morning of day 15, I stirred the starter, discarded all but 40 grams, and fed it 80 grams of whole wheat flour and 80 grams filtered water, mixing it up so there was no dry flour left.
It wasn't quite ready to be used in my focaccia recipe on the morning of day 15, so I gave my levain another feeding.
Sourdough Starter Day 15
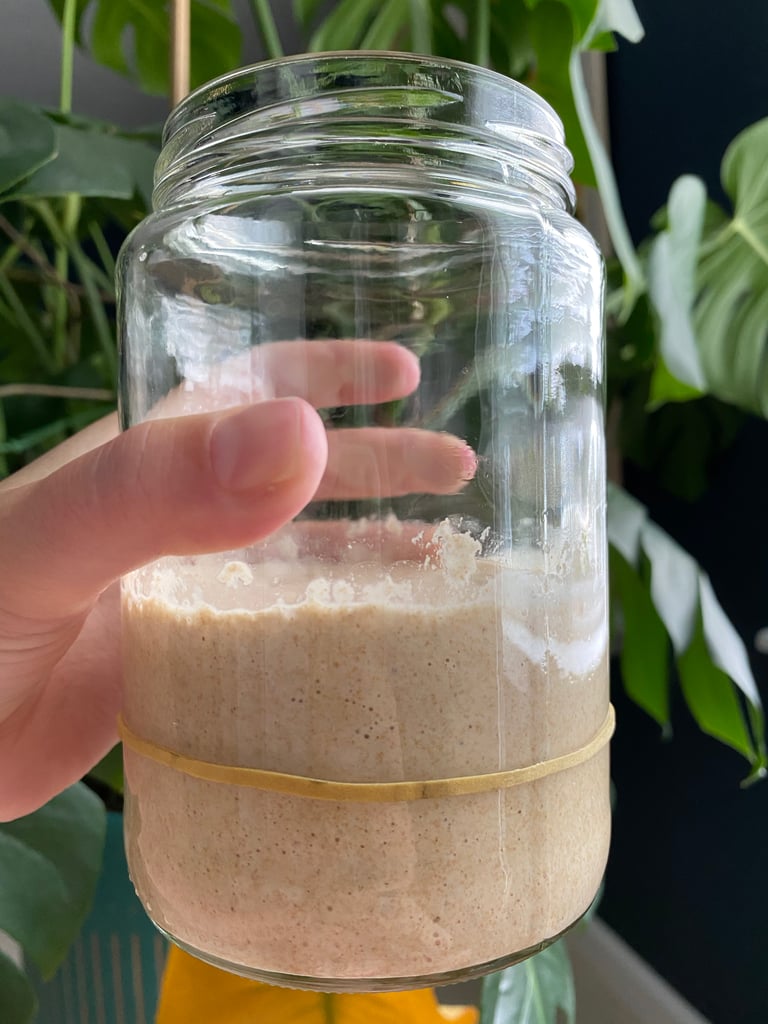
- In the evening of day 15, I stirred the starter, discarded all but 50 grams, and fed it 100 grams of whole wheat flour and 100 grams filtered water, mixing it up so there was no dry flour left.
In the afternoon of day 15, the sourdough starter had more than doubled in size and was active enough to use for focaccia. I also tested it out by dropping a piece of it into a cup of water to see if it would float. (It did!) This is how you can test if your sourdough starter is mature enough to use in a recipe.
Sourdough Starter Day 16
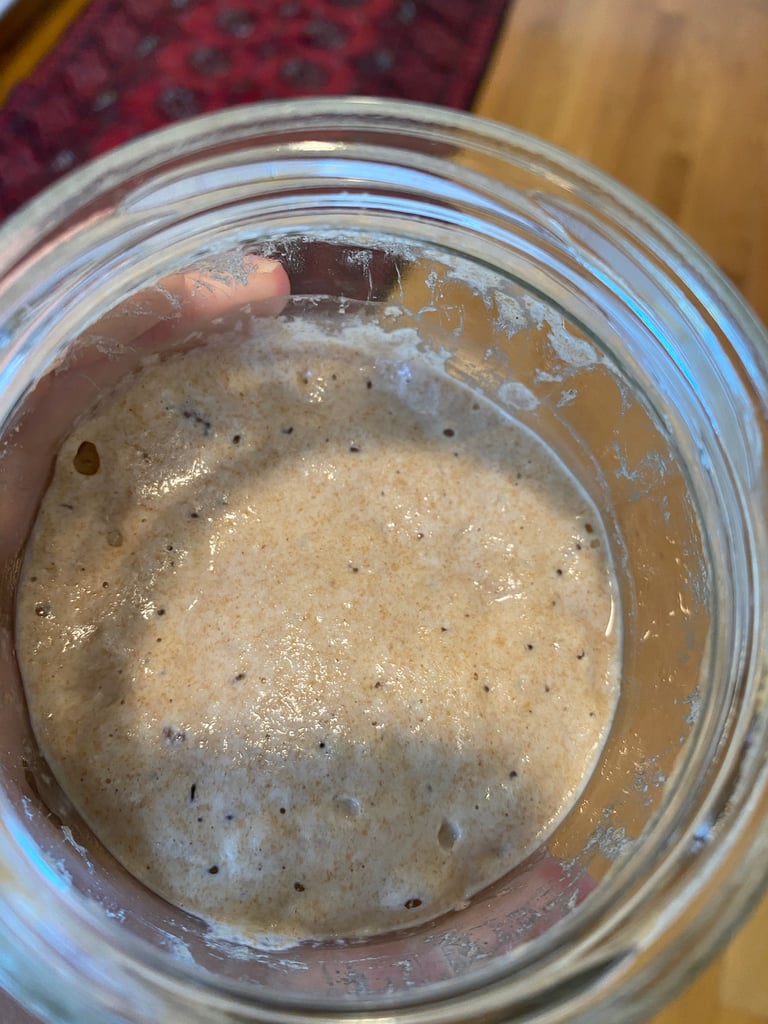
- In the morning of day 16, I stirred the starter, discarded all but 50 grams, and fed it 100 grams of whole wheat flour and 100 grams filtered water, mixing it up so there was no dry flour left.
It was quite a roller coaster, but by day 16, my sourdough starter was healthy, active, and rising and falling predictably. Now my next challenge will be actually making a loaf of sourdough bread [7].
Sourdough Starter Day 16
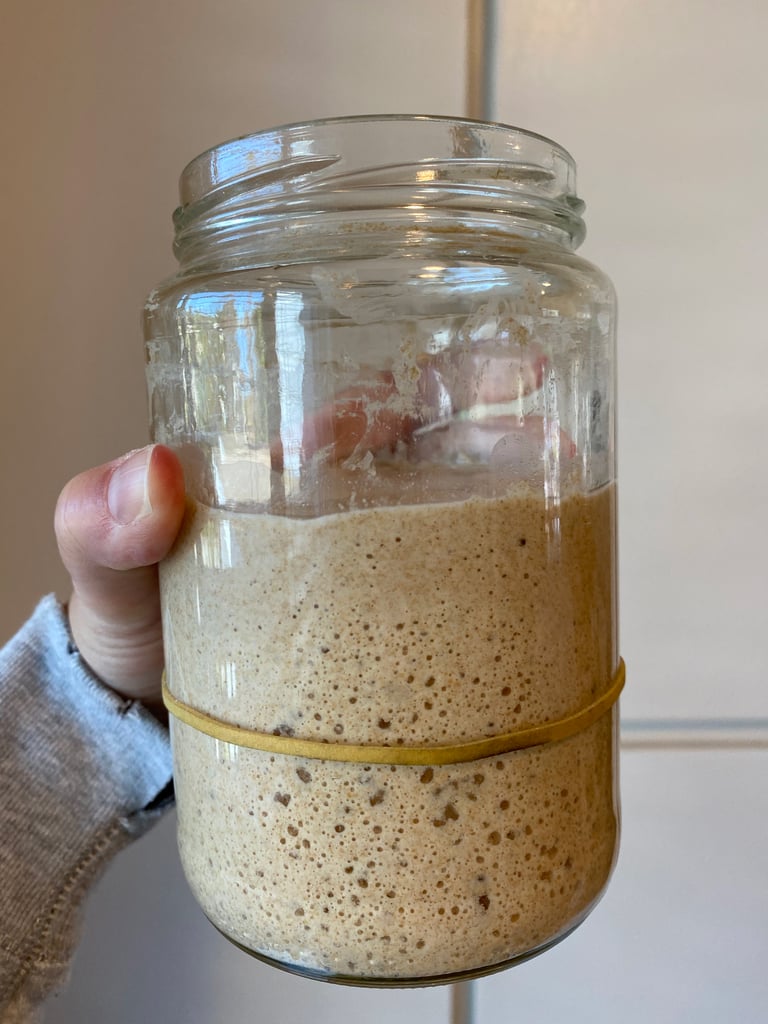
Some final thoughts: once your sourdough starter is strong and healthy, you can pare it down so that you're not using as much flour (and discarding as much). Another option is to put it in the refrigerator and then you only need to feed it once a week. You will want to take it out a few days before you plan to bake with it and feed it two to three times at room temperature.
Hope this was helpful. (It's the yeast I could do.)
Tara Block [8] is a former PS deputy editor.