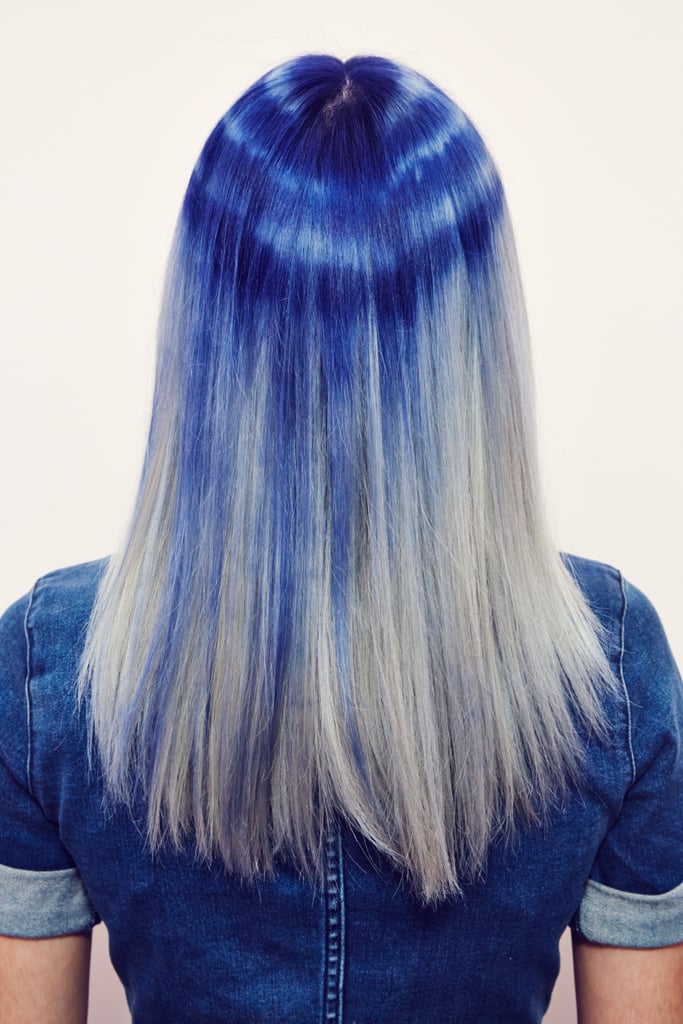
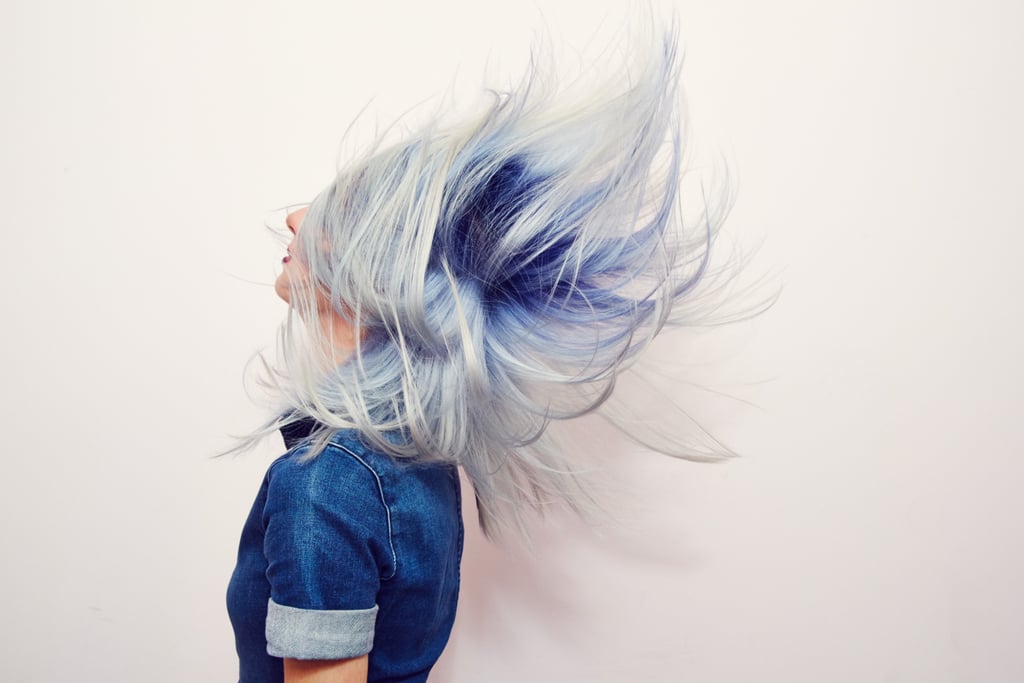
Save for one balayage two years ago, I am a hair-dye virgin. For the past few years, I've lusted after denim hair. I'm talking full on Britney & Justin 2001 VMAs hair [1] that matches the denim-on-denim I'm prone to wearing. But there was one glaring issue that kept me from swan-diving into a vat of blue dye.
I'm a brunette, and to lighten my hair would mean that I'd have to undergo the dreaded "double process" and bleach my entire head. Quite a few times, I'd pick up my phone to book a dye job, only to back out when the salon's receptionist asked me what process I wanted. Single? Double? I only know how to answer that question in regard to ordering an espresso.
So that's how I ended up actually sitting down to Google "What Is Double Process?" Alone at my kitchen table, illuminated only by the light of my MacBook Air (and the Fenty Beauty highlighter I tried at work [2]), I shame-searched my questions away. I read everything I could about the process — and I was still confused.
My main qualm was that, while there are plenty of informative pieces on hair-dye techniques, many of the stories only show the "after photos." I am the type of person who won't go to dinner without obsessively Yelping the restaurant. I need the down-and-dirty, no-holds-barred explanation of a process — not just cute, curated Instagram pictures of a blowout.
I'd pick up my phone to book a dye job, only to back out when the salon's receptionist asked me what process I wanted. Single? Double? I only know how to answer that question in regard to ordering an espresso.
So with POPSUGAR's blessing, I booked a photographer, and a session at Seagull Salon with Jeanise Aviles [3] in hopes of basically writing the post that I wanted to read before undergoing the process myself. With her electric green hair (and matching eyebrows!), Jeanse is known and loved throughout New York due to her ability to turn her clients into living, breathing rays of rainbow-haired sunshine. Indeed, her vibrant Instagram feed [4] is honestly better at cheering me up than a thousand cute dog pictures.
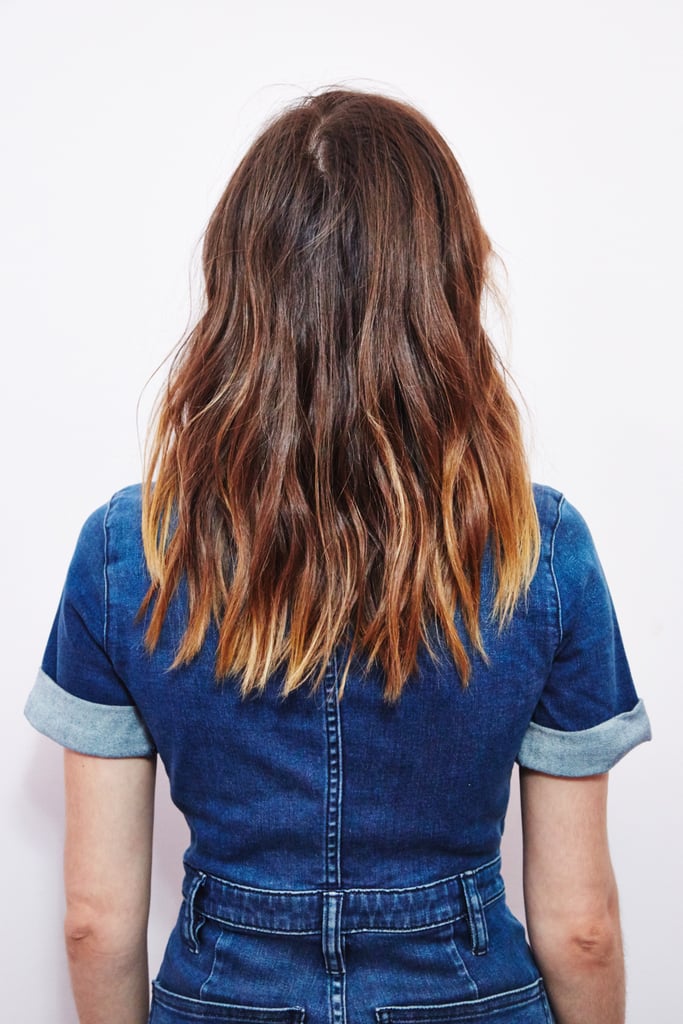
I came in to what was supposed to be a five-hour appointment with chestnut-brown hair and left eight hours later with '80s-acid wash coloring all over my head. Ahead, here's everything I learned about the process, because knowledge is power, y'all!
When I showed Jeanise my inspiration, she asked if I would feel comfortable ditching the soft, 2016 version of denim hair [5] for something even more rockstar.
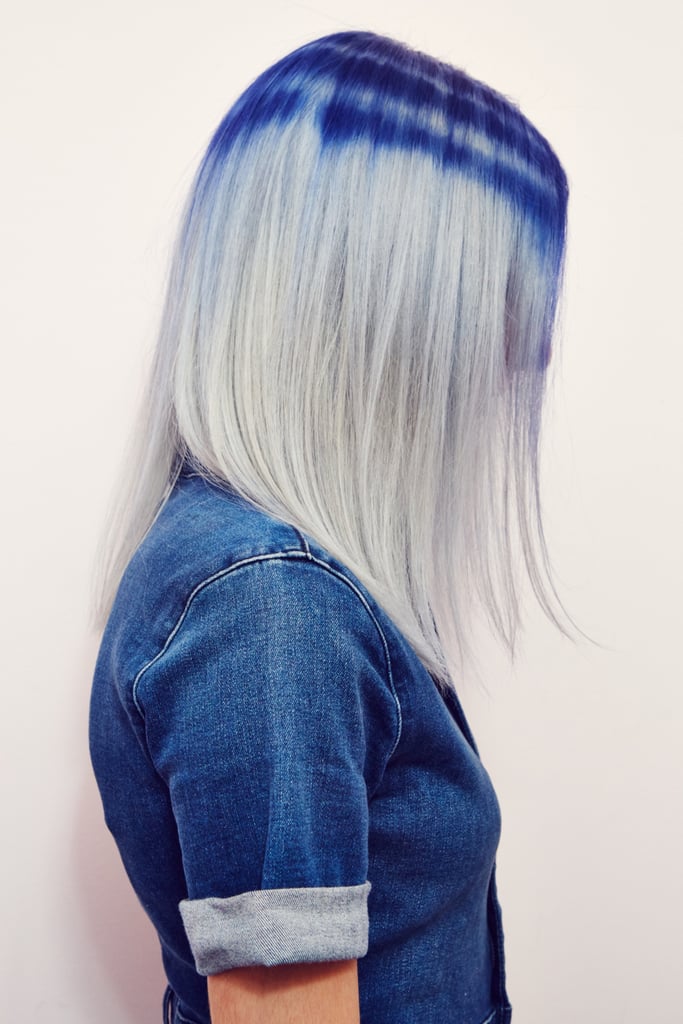
"I want to make it acid wash," Jeanise said. Instead of having one color straight through, Jeanise suggested adding a base tone of denim, with soft white highlights around the crown of my hair to mimic the whisps of well-worn jeans.
(Oh, and that '70s fab getup I'm wearing? Those are Second Skin Overalls [6] ($250), and if I was a cartoon character who could only wear one look for my entire life, I hope it would be this).
I responded with my go-to for a stylist, which is, "I trust you." I genuinely do trust anyone with as much experience as Jeanise, but when Shaun SureThing [7], the co-owner of Seagull heard this, he told me that is the one thing I should never say to a stylist.
"You barely know [her]!" he reasoned. "You've talked with [a stylist] for, like, five minutes." He insisted that it's imperative for someone to actually understand their stylist's vision. Even though you're excited, don't just say "I trust you" to shut them up and start the process.
So I backtracked and let Jeanise explain more about her goals for the look. First, she would bleach my head — that's what I was expecting. Then, she would tone the blond to make it a little icier — think Daenerys. She'd leave the ends of my hair that frosty color, to mimic the way your favorite pair of jeans rip at the hem.
After that, she'd tone the crown of my hair, making it the traditional "denim" I was asking for. Then, she'd take a paint brush and streak on slivers of more white that look like the whisks around the pocket area of jeans.
This was drastically different than what I went in expecting, so I was glad she explained it totally. For all you micromanaging queens out there, let this be a lesson to you: always know what you're getting into.
A few more things to note before booking: the process basically takes a whole workday. I was lucky enough to get to do this for work, but if you can't get away Monday through Friday, be prepared to spend basically an entire weekend day at the salon.
But, as Jeanise warned, if you're the type of person who likes to go wild on the weekends, maybe don't book a 10 a.m. Sunday appointment. If you come in hungover, you'll be dehydrated, tired, and genuinely more sensitive. This can all affect how much your bleach hurts (more about that later). Basically: don't be a hot mess, which is just good life advice in general.
Be prepared to spend basically an entire day at the salon
And just like you would for a Brazilian, don't book during your period. "Either go a week after your cycle, or a week before," Jeanise advised. This is because your body pumps out more hormones [8] to help you deal with your period, and one side effect of those culprits is extra skin sensitivity.
My skin can be a bit of a baby even when I'm not PMS-ing. Like many women, I have been known to pop an Ibuprofen (or two) before any wax appointment. I asked Jeanise if that would help. "Sure," she said. "Pop an Advil before you get in, or take two during the process."
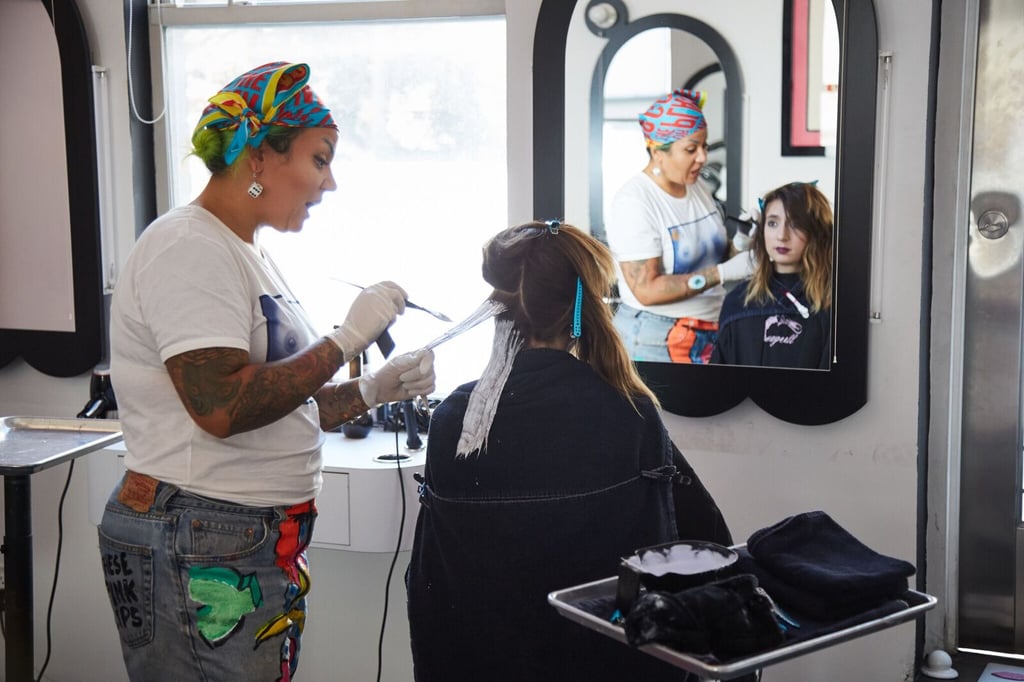
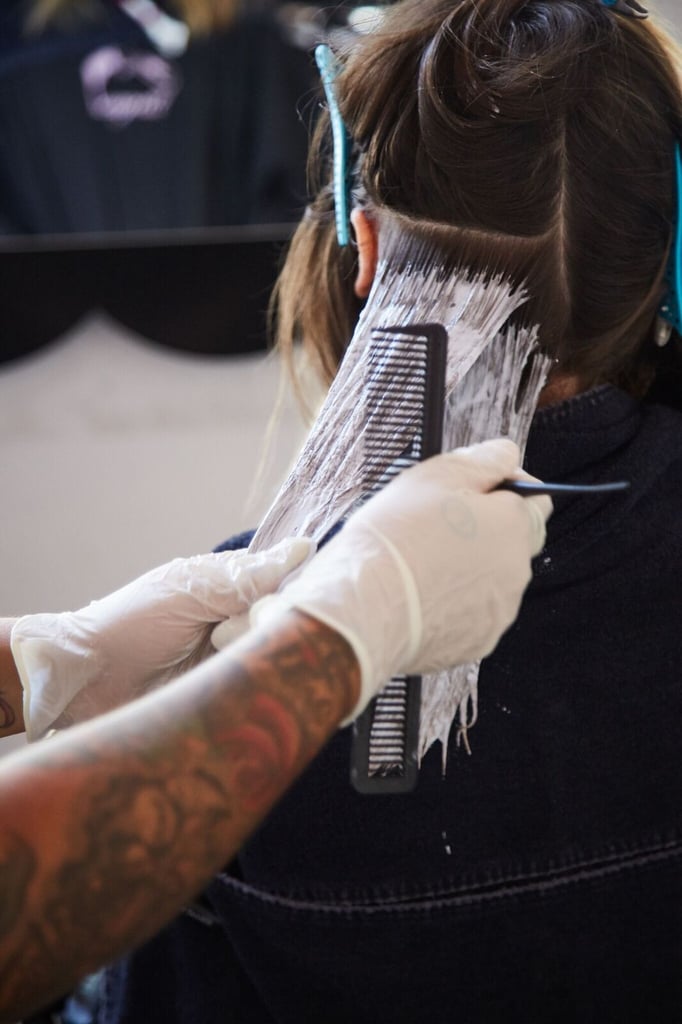
We had a long afternoon ahead of us, so Jeanise and I settled in. She applied the first round of bleach to my hair, from the ends to about one inch from the roots. Jeanise called that section my "cold hair," which needs more time to develop than roots do.
As it turns out, roots are considered "hot hair." According to Jeanise, this is because body heat accelerates the process of bleach working. For that reason, the first round of bleach is applied only to "cold hair," since that takes more time to oxidize (that's the big-girl word for stripping away the hair's original color).
In this picture, you can see how Jeanise is leaving my "hot hair" be . . . for now.
As she applied the bleach with a brush, Jeanise combed through my strands. She didn't want to leave any extra bleach residue hanging out on my hair, because that can add gross green tones to what should eventually be a bright blond.
Real talk: I felt a little bit of itching on my head at this point, but Jeanise said that was just the placebo effect since she hadn't applied any bleach to my roots yet. So fellow hypochondriacs, take note: if you feel itchiness at this point, you're being dramatic. Settle down.
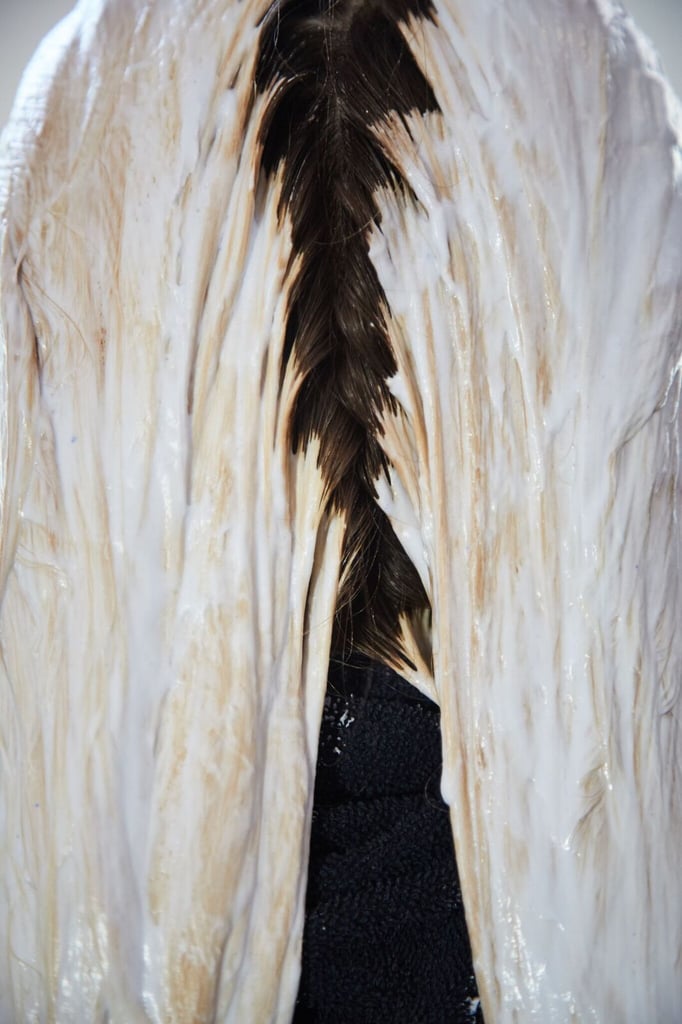
Look at the contrast from my natural brown to the punk, Debbie Harry-esque blonde. The bleach works fast — this first round was only on my hair for about 20 minutes. You can literally see my strands changing in this picture. Science!
After giving my "cold hair" enough time to oxidize, we finally bleached my roots. Jeanise was sure to get everywhere I had hair on my head — including down to my sideburns. You want your stylist to cover your strands equally, to ensure a uniform job.
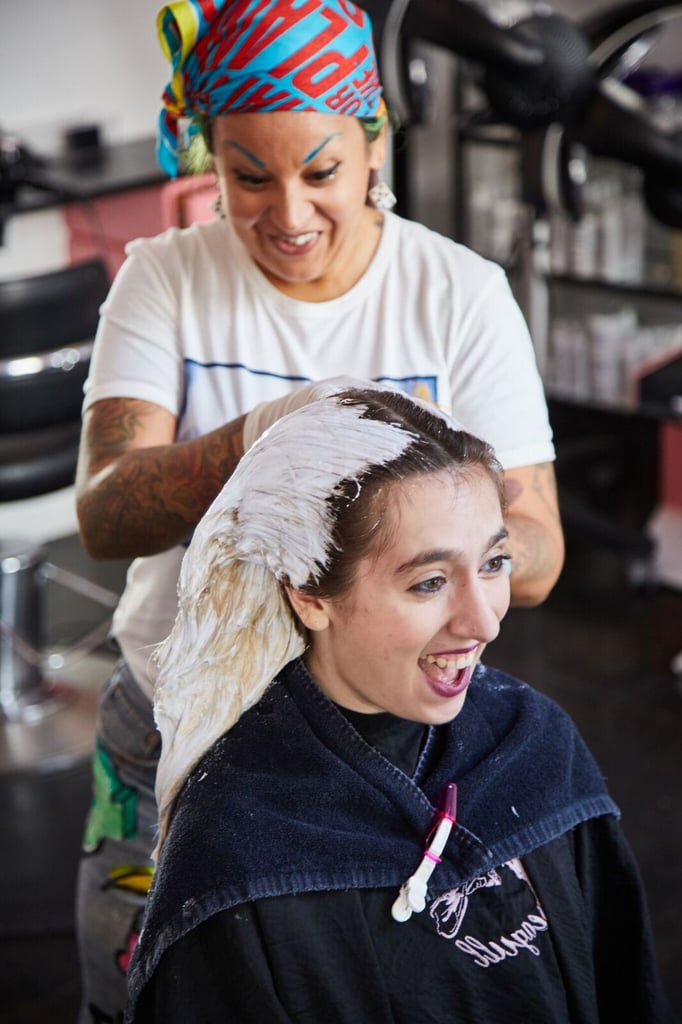
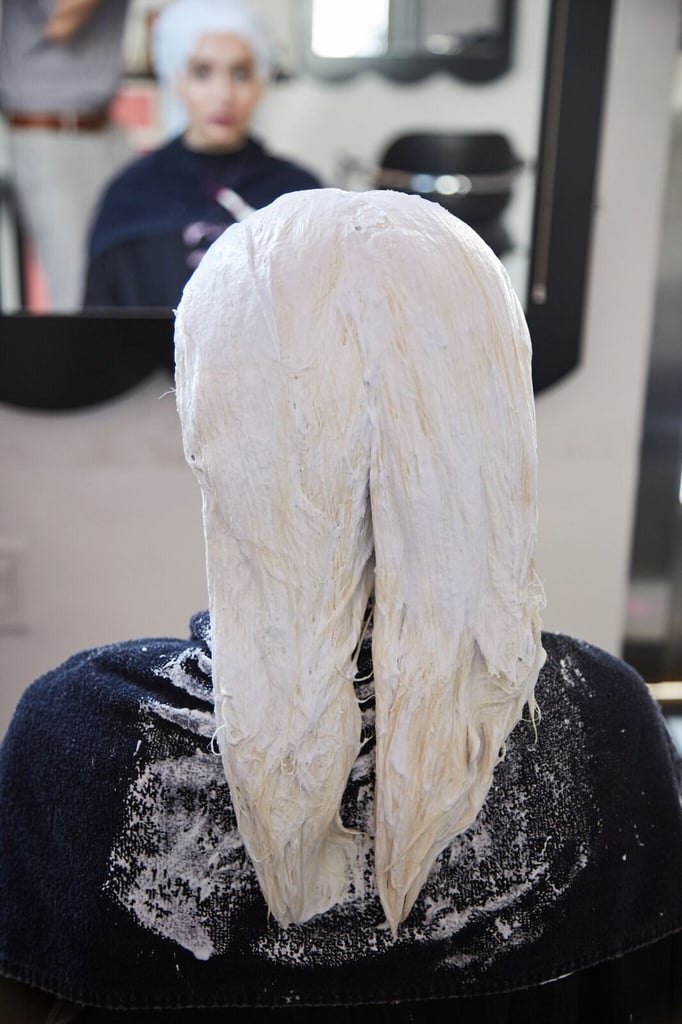
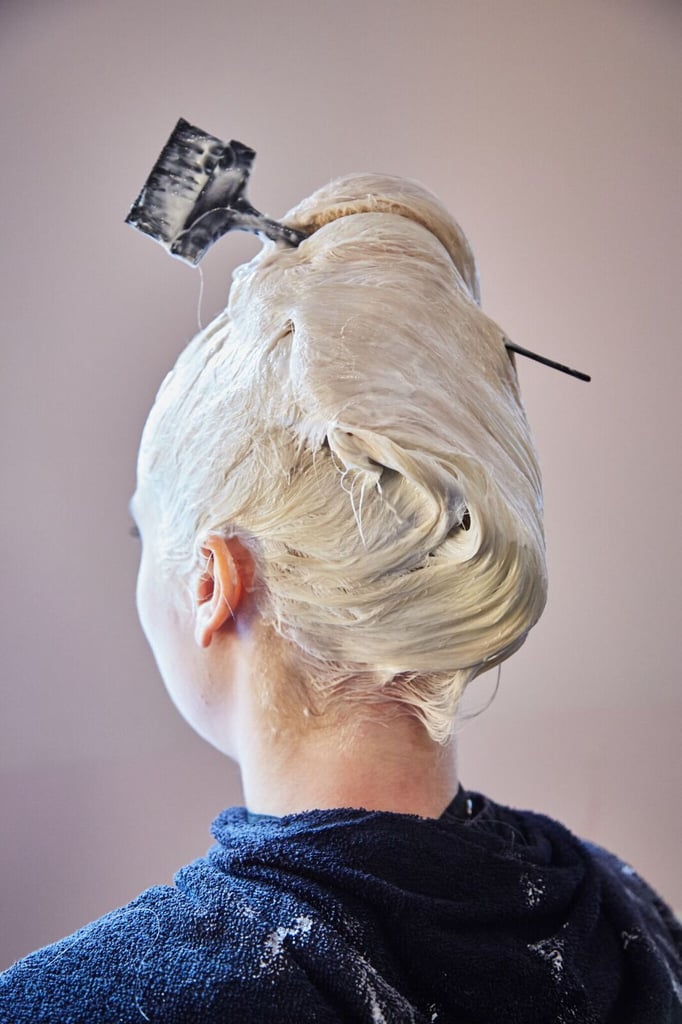
As the dye oxidizes, it expands, giving you George Washington hair. At first I enjoyed this, because I am still a poor plebe who hasn't seem Hamilton yet, and I got to re-create the show via my own colonial-esque look.
But then I started to feel the weight of the dye on my head, which hurt a lot. Everyone's different, but for me, my neck cramping felt way worse than any itchiness I was experiencing.
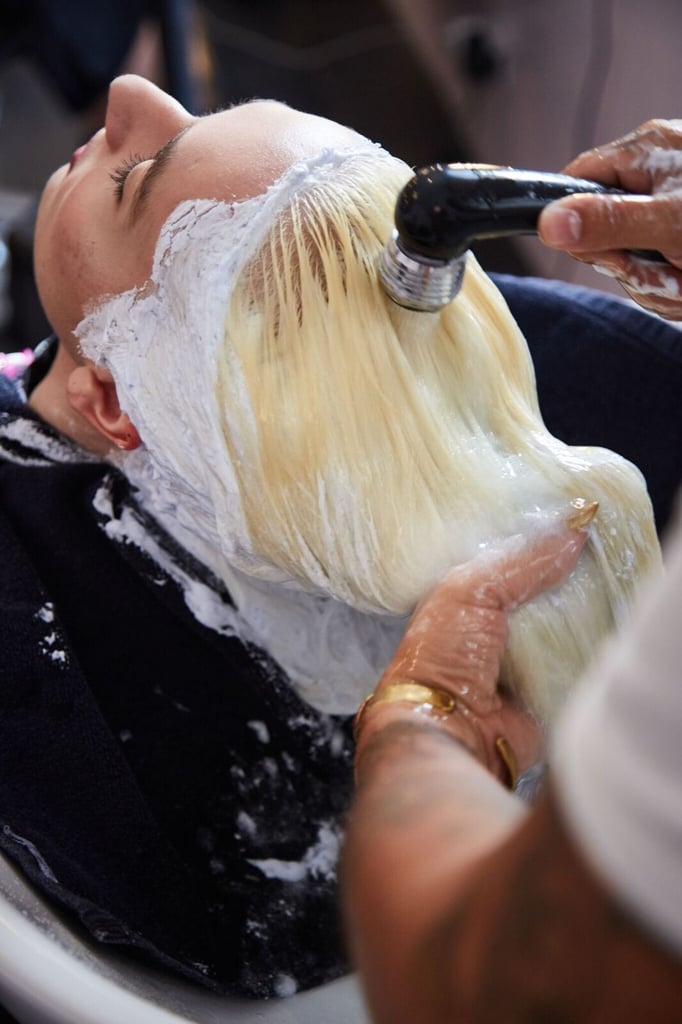
After 20 minutes under the processor, Jeanise washed out my hair and revealed the completed first step in my process.
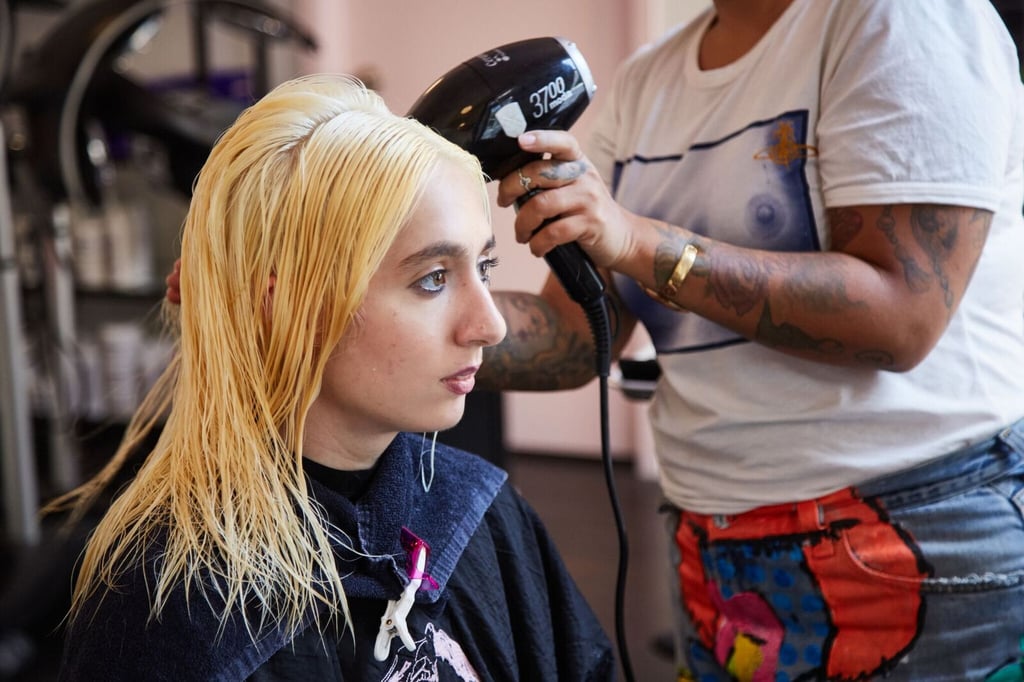
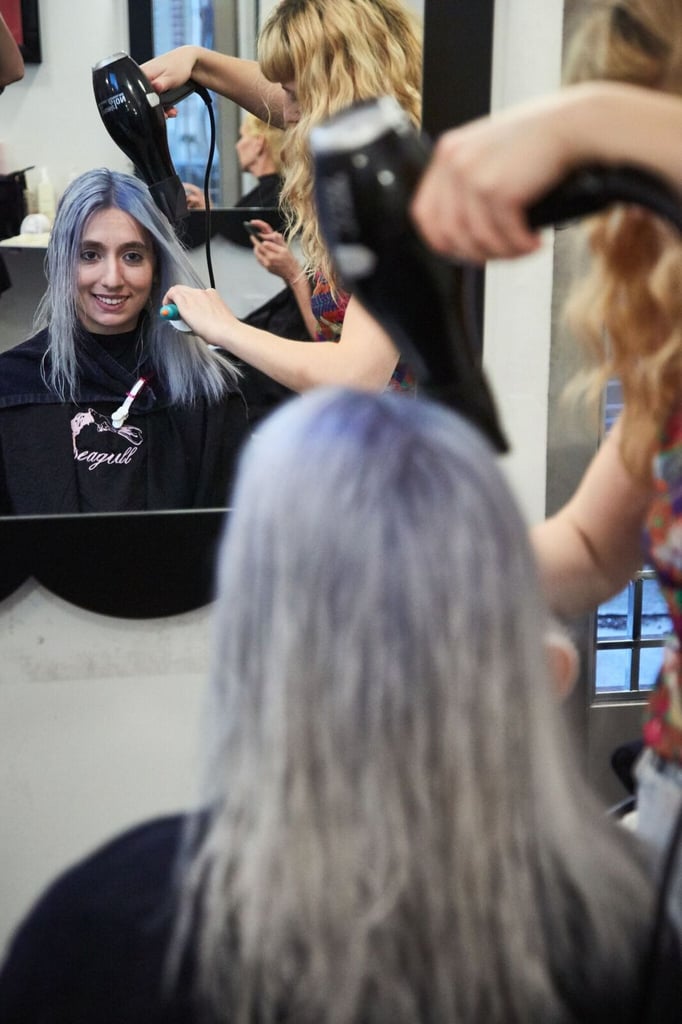
While I enjoyed having platinum hair, it was not meant to last. After a blow-dry, next came the toner to give me that icy, Daenerys 'do.
Oh, hello 2015 platinum blonde Lady Gaga [9]! The first application of toner left me with an icy, Winter princess shade that I honestly considered straight up keeping.
After the maintenance of the first bleach, this step was the first true move toward acid-wash hair. The frosty base will show on the ends of my hair, replicating the ripped hem of jeans.
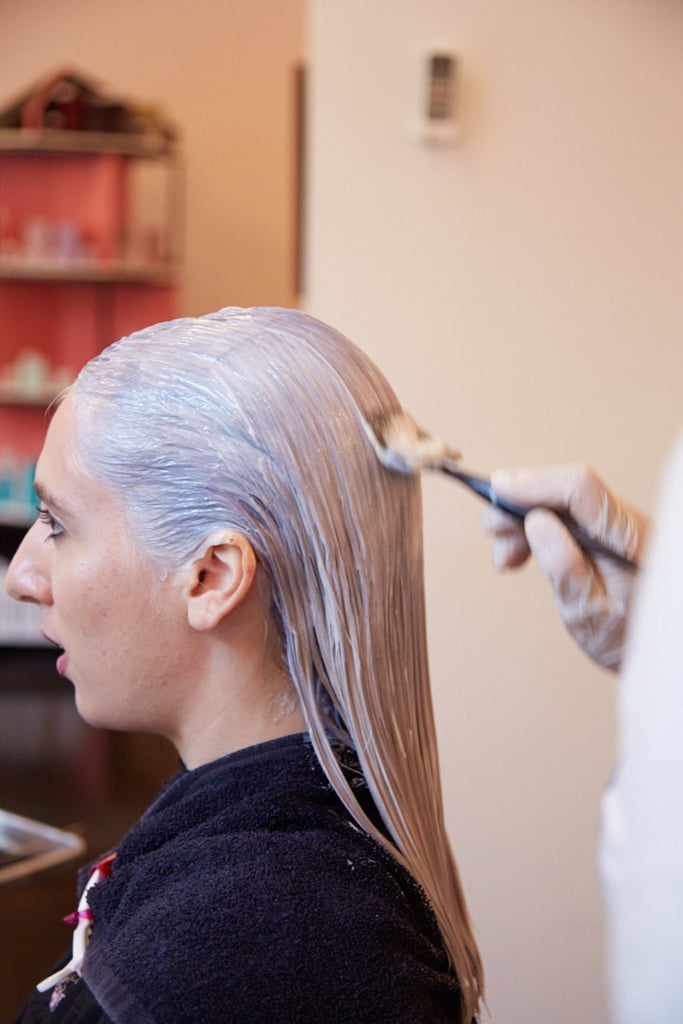
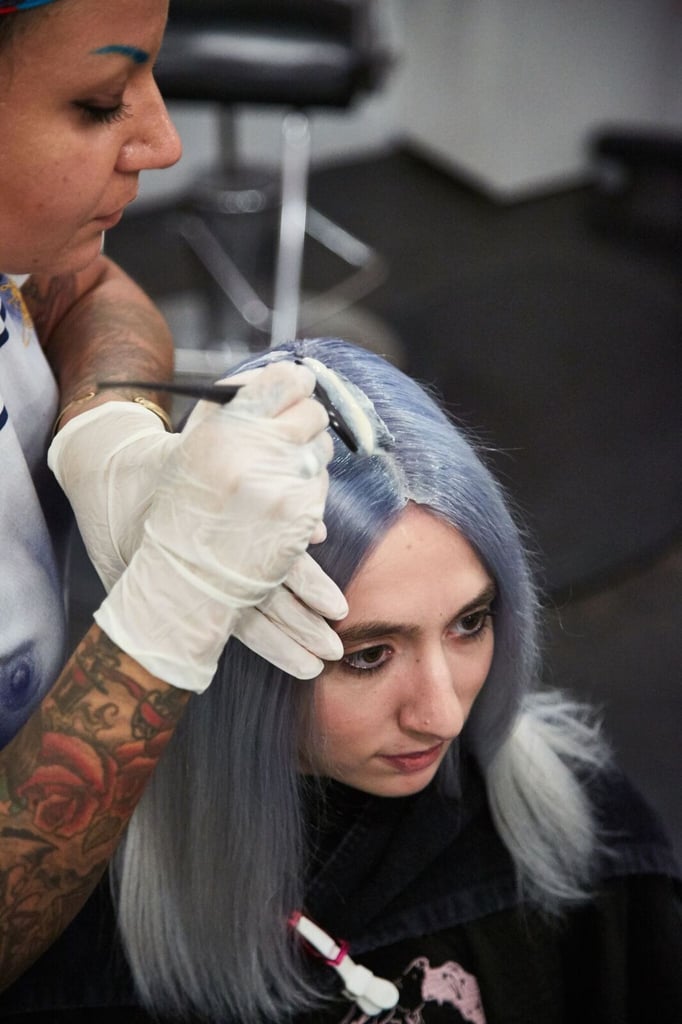
Here comes the denim! Jeanise painted on the next step of light blue toner. She applied it from the crown of my hair to halfway down my head.
Jeanise said that if you're applying streaks of a funky shade rather than dying your entire hair one uniform color, it's smart to paint the hue on while your hair is in a middle part.
Even if you're prone to side parting, putting the color on via the middle ensures versatility, because the application is symmetrical. That means no matter how you wear your hair, your color will look even and purposeful and won't imbalance your face.
This step actually uses a demi-permanent hair dye (as opposed to semi), so this will only last about eight washings.
After the dye came another round of blow-drying. By this point, I had been in the chair for around six hours and still had one more round of white to go.
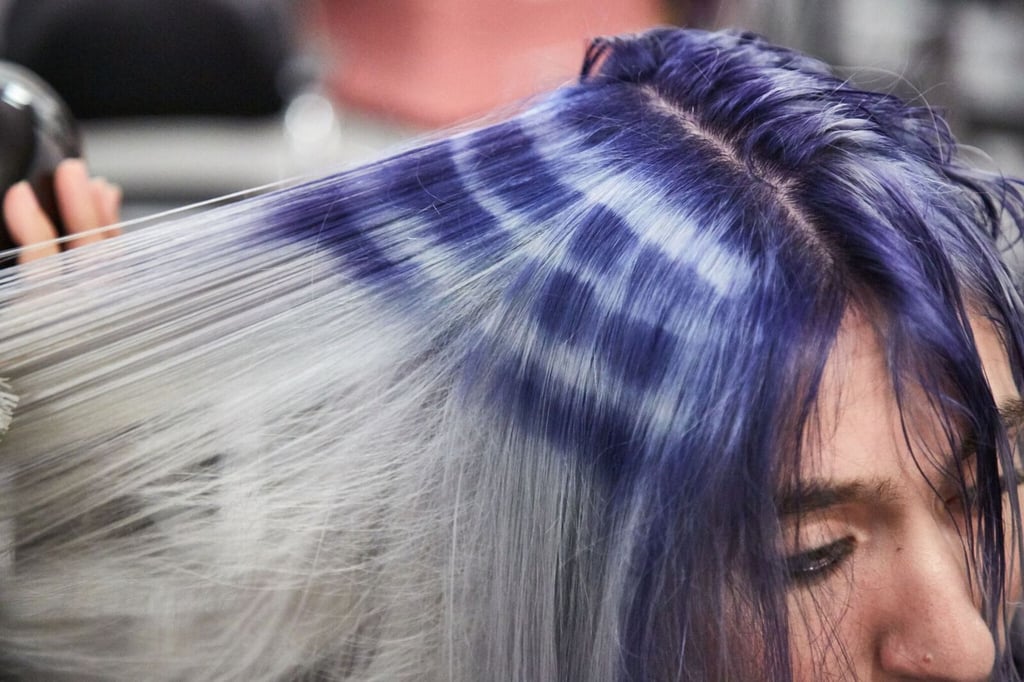
Now comes the acid wash. Jeanise artfully swiped rings of white around my head. I like to think it looked like a halo, because I'm such a hair angel now.
As the look is took shape, so did the compliments around the salon. At this point, I noticed a viewing party of stylists and clients around me, gawking over my acid-wash hair. Is this what life is now?
As you can see, the dye got brighter as it locked into my strands. Ladies and gentlemen, we are ready for the grand reveal . . .
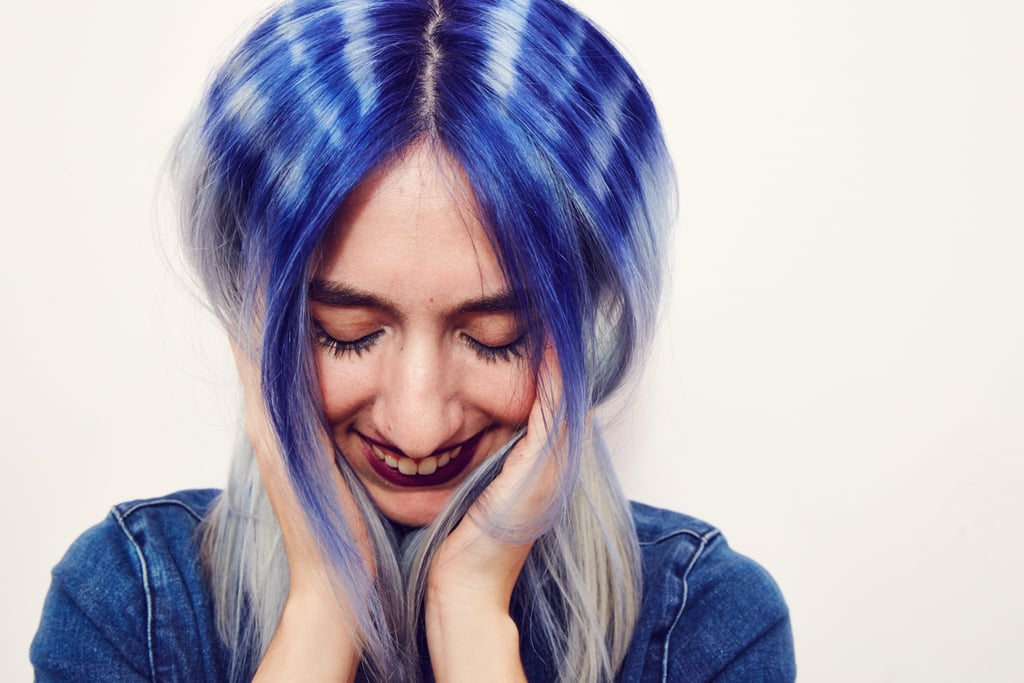
. . . Of acid wash hair! Eight hours later, my dreams of '80s rocker hair came true.
Losing my dye virginity ended up being a pretty painless experience — much easier than losing my actual you know what. When I touched my hair for the first time after doing what I'd always been told would totally ruin it, I felt that my texture was still as soft and silky as before.
But there was an added extra grit and heft to my hair that I instantly appreciated. After spending a lifetime bemoaning what I thought to be limp, lifeless strands that did not enjoy holding a curl, I found that coloring my hair f*cked it up just enough.
Whereas before I'd need a touch-up with an iron by 6 p.m. if I wanted to wear a full day of curls, with my new acid-wash hair, waves hold overnight.
Before the appointment, I prepped myself, a daily hair rinser, for a lifestyle change. I hoarded dry shampoo (Ouai Dry Shampoo Foam [10] [$35], you're my everything!), but when Jeanise said it's best to wash once every 10 days, I audibly gasped. We ended up compromising by agreeing that I'd rinse every seven days. I was still terrified.
I'm writing this post exactly one week after coloring my hair. I was able to go five days without washing, which honestly felt like an Olympic-level victory for me.
Along with the aforementioned Ouai Dry Shampoo Foam, I also love R + Co Skyline Dry Shampoo [11] ($36). It pumps out like a baby powder, instead of a spray, so I can rub it into my hair as opposed to just spritzing over strands. I find that using my hands to apply product lets it really settle in and leaves no white powder on my head.
Jeanise suggested using Milbon Replenishing Shampoo and Conditioner [12] (sold at salons), to extend color. The one time I washed my hair since the double process, I used a OGX Lavender Luminescent Platinum Shampoo [13] ($8). I haven't noticed much color fade, so I'm pretty happy with the results of that drugstore option.
Since I heat-style my hair more often than I care to admit, I use Briogeo Don't Despair, Repair Deep Conditioning Mask [14] ($46) as a weekly deep clean. I think my hair thanks me for it by staying pretty.
The color is projected to last for about eight weeks. That sounds like a lot of maintenance, and it is, but I prefer to think about it in the bigger picture.
I'll need a touch-up every two months, or six times a year. Basically, if I cut down on my 12 a.m. ill-advised online shopping binges, I can afford my new 'do and keep on flipping my hair.

![I responded with my go-to for a stylist, which is, "I trust you." I genuinely do trust anyone with as much experience as Jeanise, but when Shaun SureThing, the co-owner of Seagull heard this, he told me that is the one thing I should never say to a stylist.
"You barely know [her]!" he reasoned. "You've talked with [a stylist] for, like, five minutes." He insisted that it's imperative for someone to actually understand their stylist's vision. Even though you're excited, don't just say "I trust you" to shut them up and start the process. I responded with my go-to for a stylist, which is, "I trust you." I genuinely do trust anyone with as much experience as Jeanise, but when Shaun SureThing, the co-owner of Seagull heard this, he told me that is the one thing I should never say to a stylist.
"You barely know [her]!" he reasoned. "You've talked with [a stylist] for, like, five minutes." He insisted that it's imperative for someone to actually understand their stylist's vision. Even though you're excited, don't just say "I trust you" to shut them up and start the process.](https://media1.popsugar-assets.com/files/thumbor/foiL9JkGBekGZNAEC6QEuUdHjX4/fit-in/1024x1024/filters:format_auto-!!-:strip_icc-!!-/2017/10/02/849/n/1922153/51e3b0dc59d292473f8273.53011678_IMG_5558/i/I-responded-my-go--stylist-which-I-trust-you.jpg)




![Before the appointment, I prepped myself, a daily hair rinser, for a lifestyle change. I hoarded dry shampoo (Ouai Dry Shampoo Foam [$35], you're my everything!), but when Jeanise said it's best to wash once every 10 days, I audibly gasped. We ended up compromising by agreeing that I'd rinse every seven days. I was still terrified.
I'm writing this post exactly one week after coloring my hair. I was able to go five days without washing, which honestly felt like an Olympic-level victory for me.
Along with the aforementioned Ouai Dry Shampoo Foam, I also love R + Co Skyline Dry Shampoo ($36). It pumps out like a baby powder, instead of a spray, so I can rub it into my hair as opposed to just spritzing over strands. I find that using my hands to apply product lets it really settle in and leaves no white powder on my head. Before the appointment, I prepped myself, a daily hair rinser, for a lifestyle change. I hoarded dry shampoo (Ouai Dry Shampoo Foam [$35], you're my everything!), but when Jeanise said it's best to wash once every 10 days, I audibly gasped. We ended up compromising by agreeing that I'd rinse every seven days. I was still terrified.
I'm writing this post exactly one week after coloring my hair. I was able to go five days without washing, which honestly felt like an Olympic-level victory for me.
Along with the aforementioned Ouai Dry Shampoo Foam, I also love R + Co Skyline Dry Shampoo ($36). It pumps out like a baby powder, instead of a spray, so I can rub it into my hair as opposed to just spritzing over strands. I find that using my hands to apply product lets it really settle in and leaves no white powder on my head.](https://media1.popsugar-assets.com/files/thumbor/qeES7mSWvuBsQnln1q_71qZXIt0/fit-in/1024x1024/filters:format_auto-!!-:strip_icc-!!-/2017/10/02/848/n/1922153/5f25f232586c0242_IMG_6022/i/Before-appointment-I-prepped-myself-daily-hair-rinser.jpg)
