
Transform your space with an easy DIY that also adds a pop of color. We partnered with Glade® brand to bring you the easy steps to make it happen.
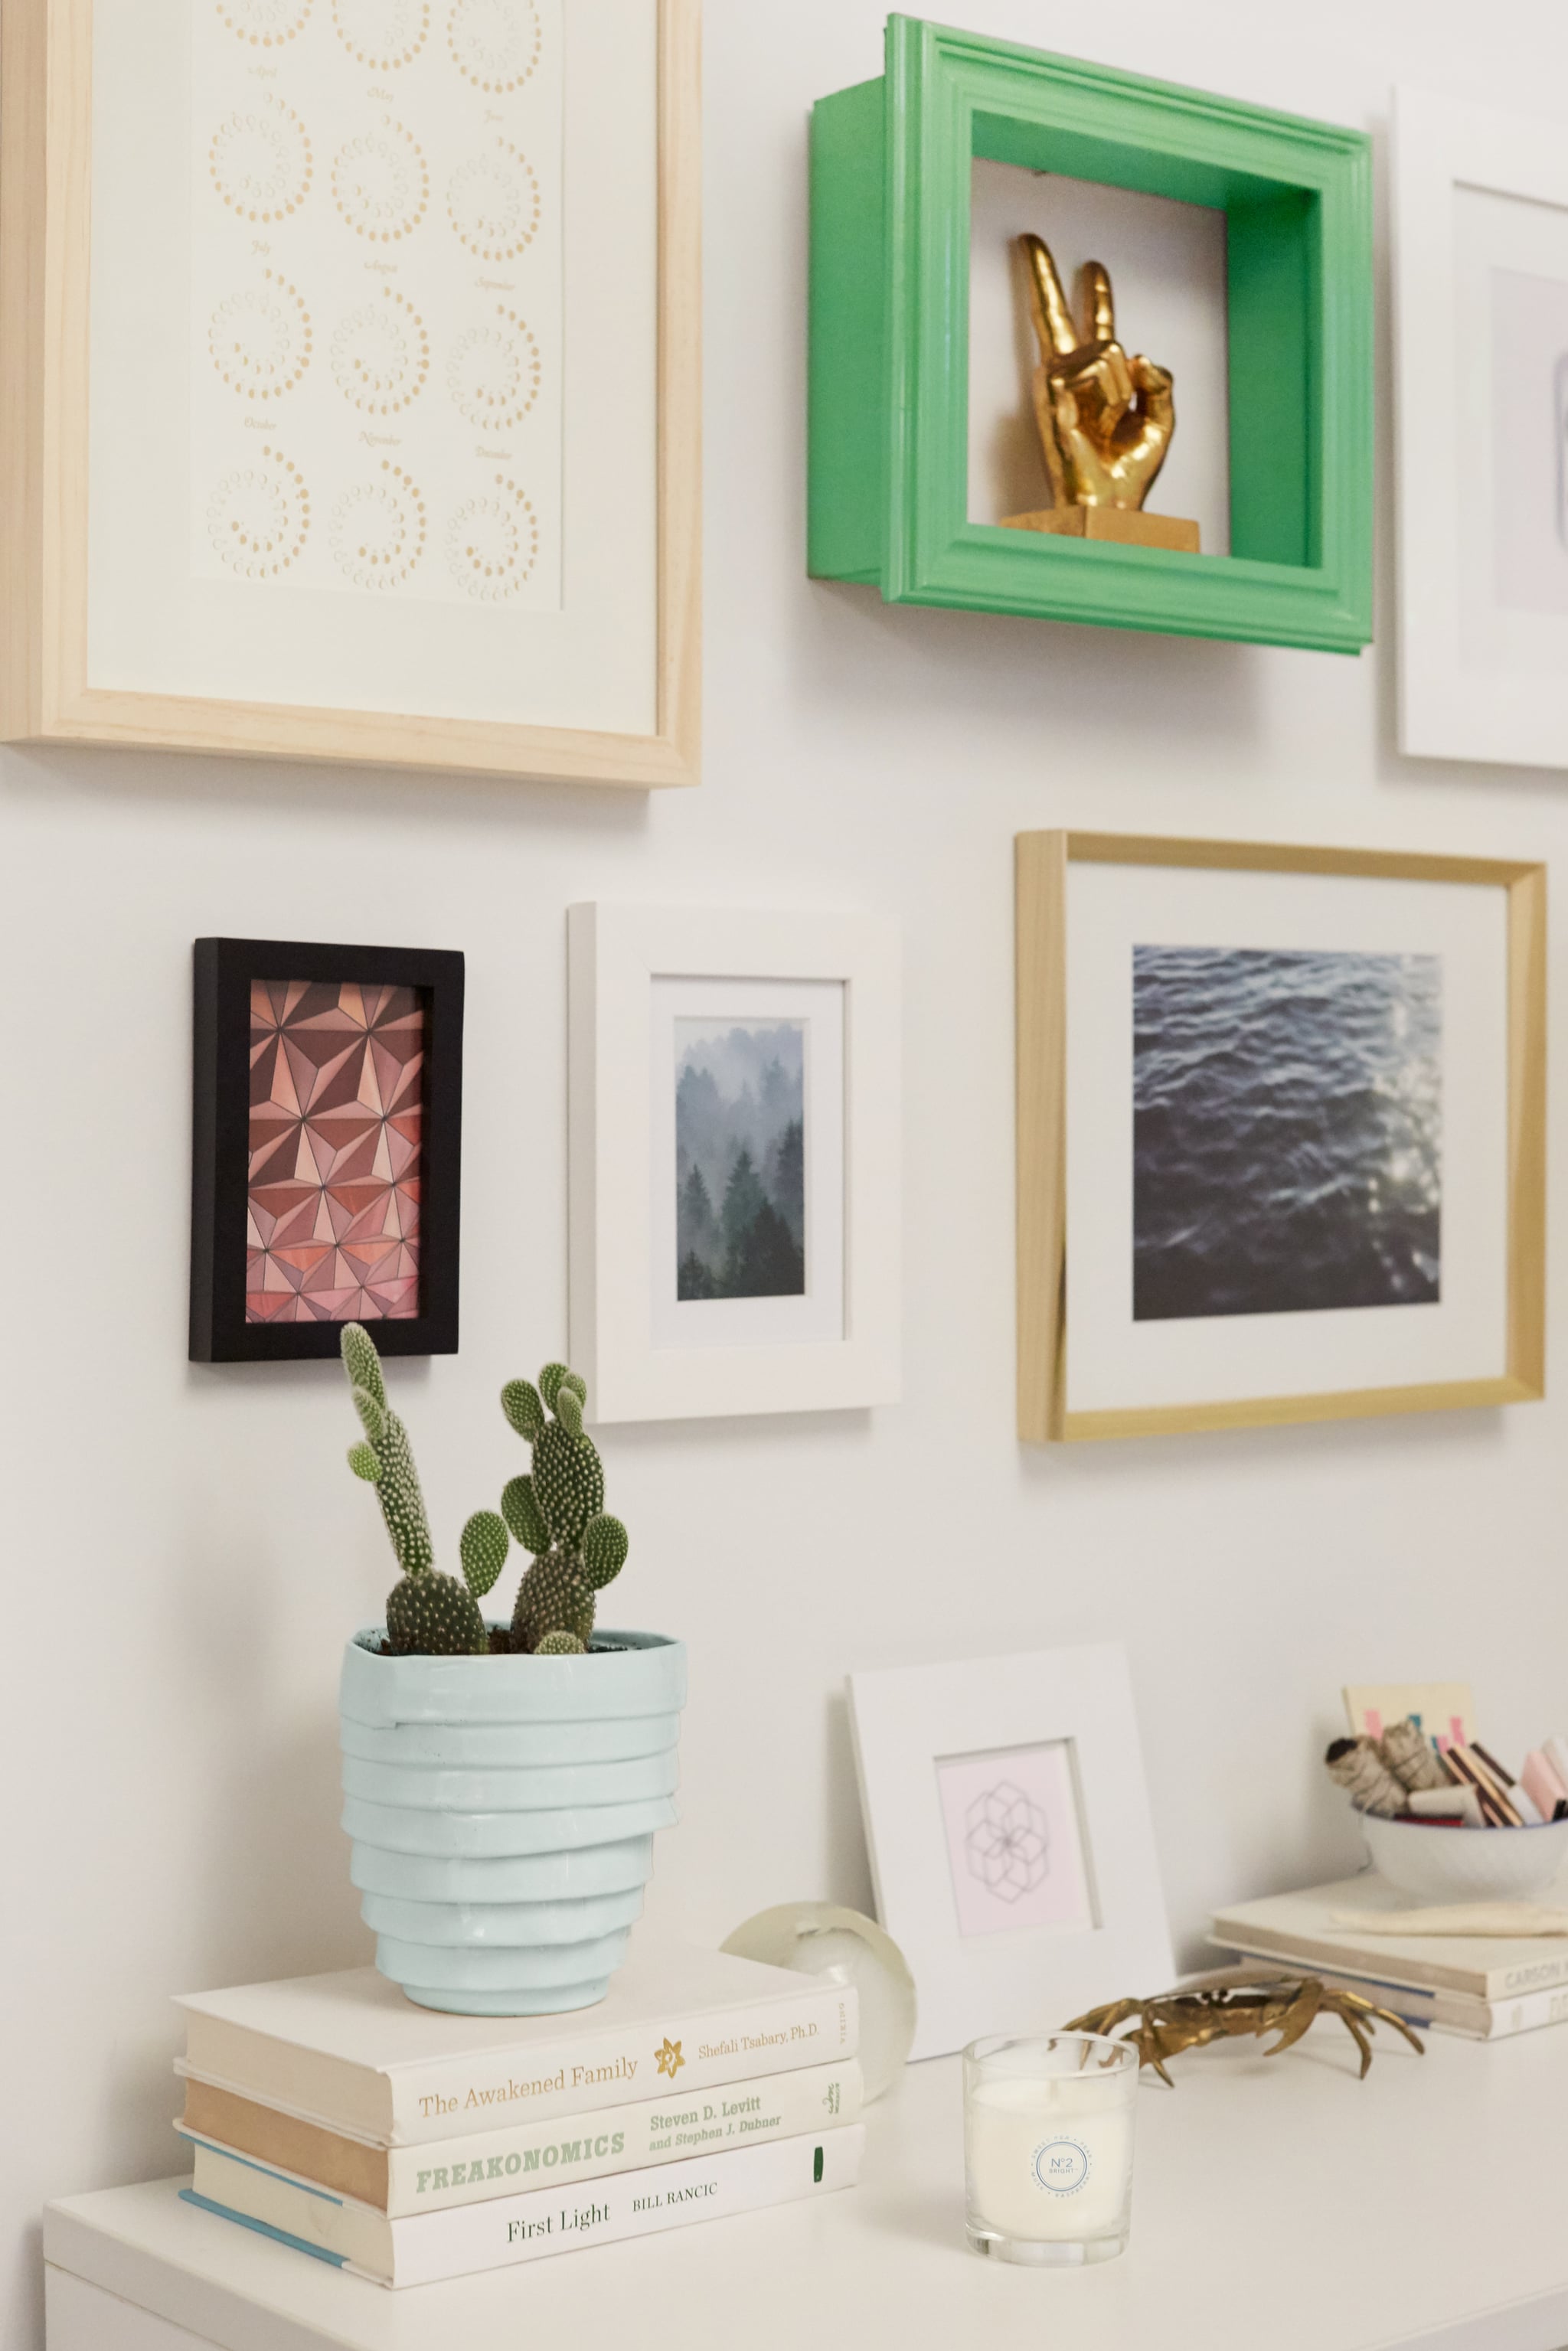
There's nothing wrong with basic picture frames, but you can add a big dose of color to your walls with these simple DIY frame shelves. Along with integrating a fresh feel into your space, it's also a cool way to display the things you love. Create an arrangement, then style alongside other items, like scented candles and your favorite books. It's so easy to pull off that you might find yourself filling all your walls.
Materials needed:
- 1 8x10-inch wooden frame
- 0.5-inch x 2.5-inch x 36.5-inch poplar length
- Handsaw
- 8 small nails
- Hammer
- Rough sandpaper
- Spray paint
- Wood glue
- 2 3/4-inch x 1.9-centimeter corner braces
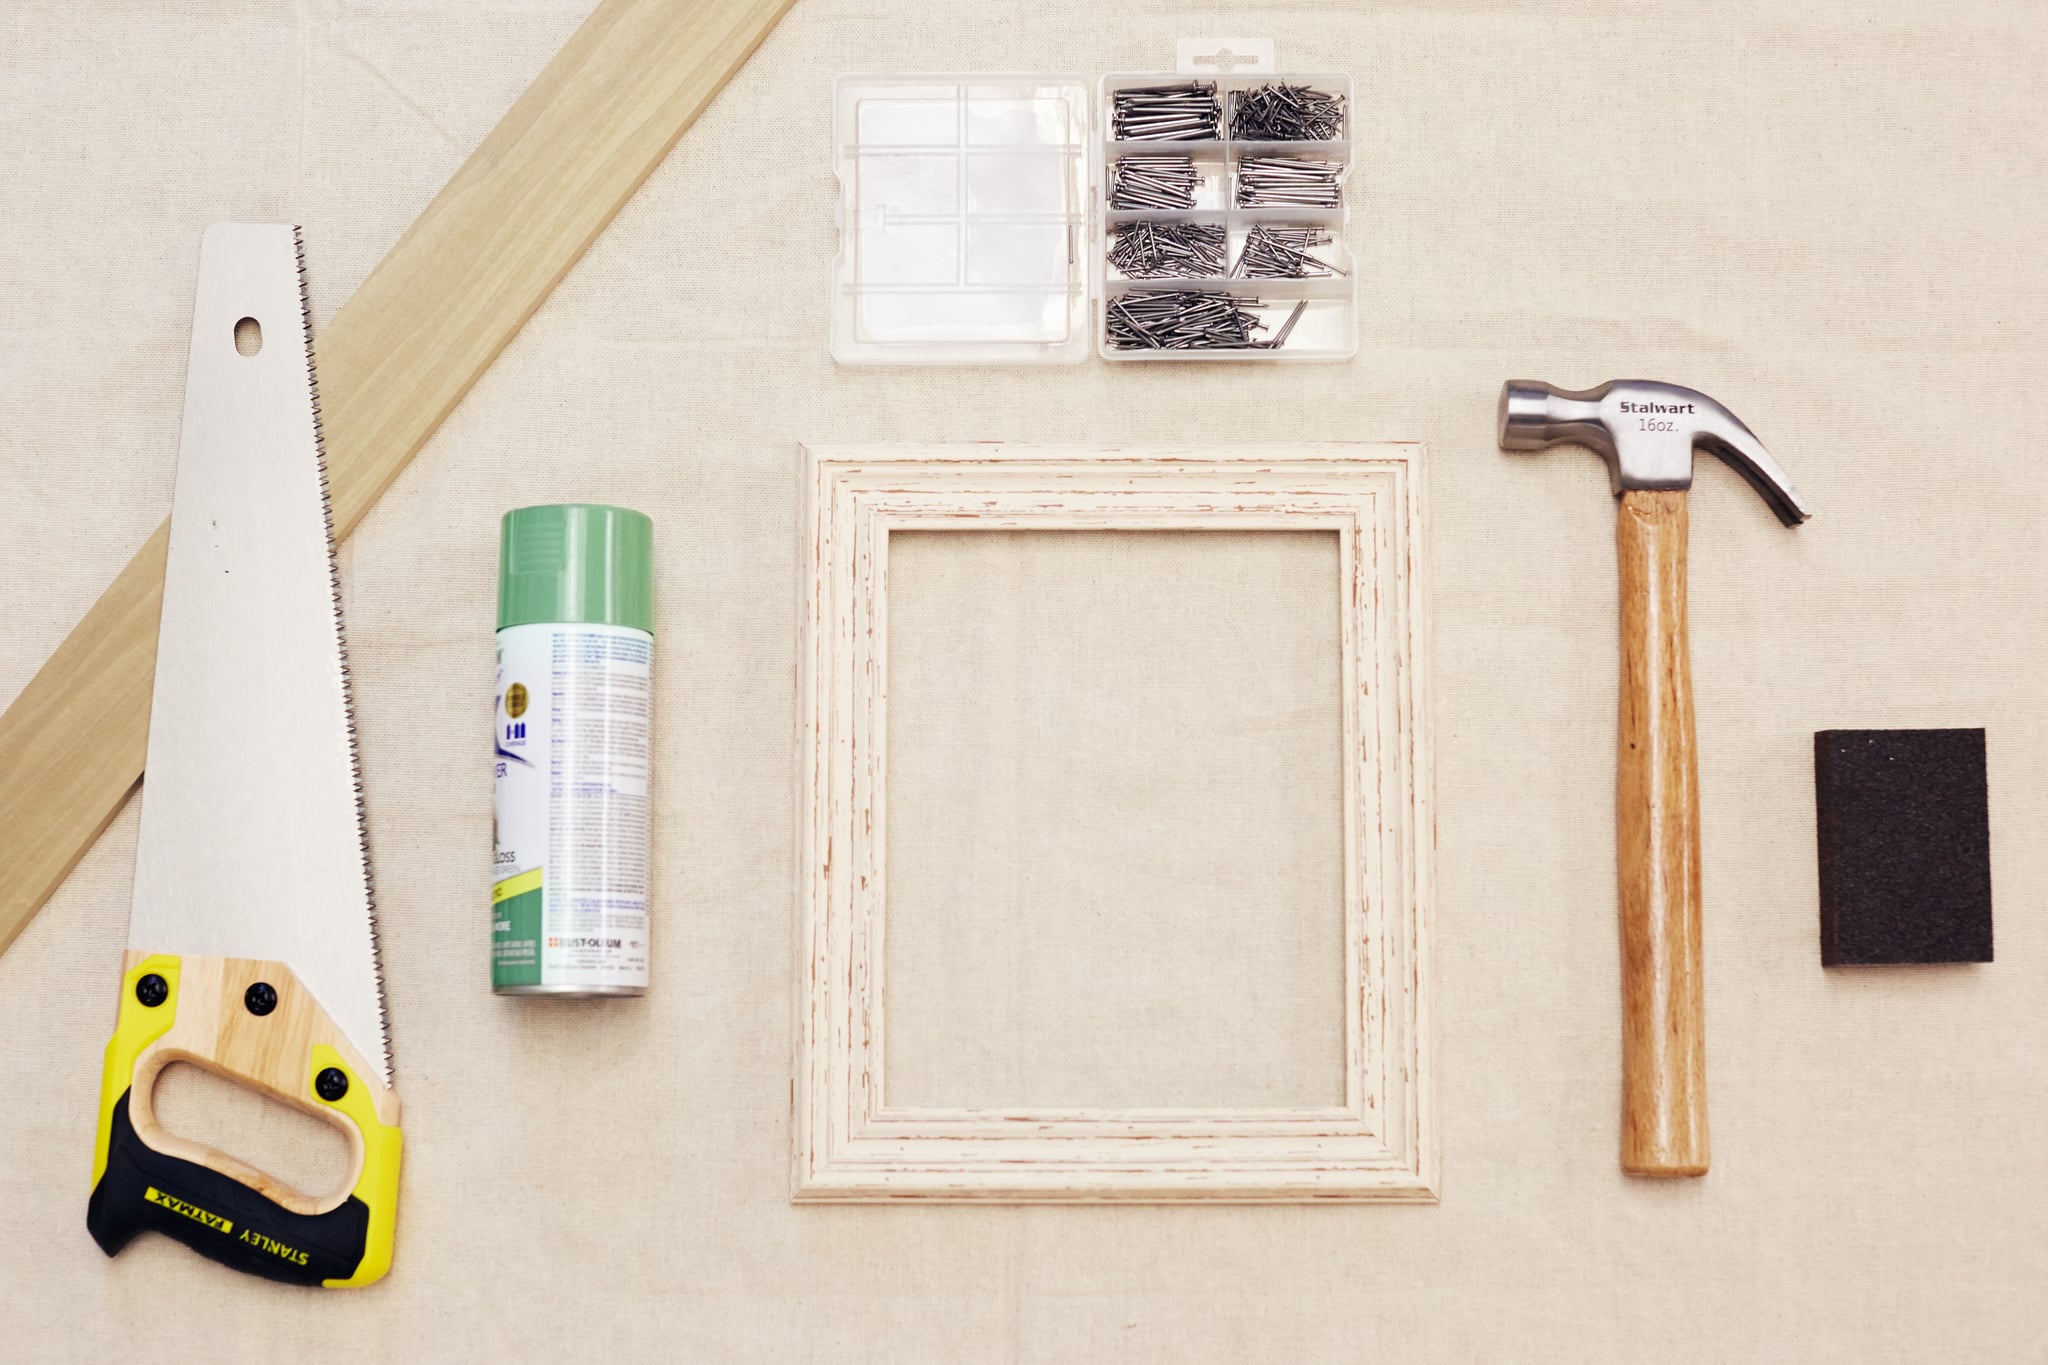
Image Source: POPSUGAR Photography / Diggy Lloyd
Directions:
- Measure and cut the sections of wood. The longer side will depend on which way you want to hang your frame shelf, so decide before beginning whether the shelf will hang vertically or horizontally. The longest sides of wood should be seen from the sides of the shelf, which creates a nice, finished look. So you'll need either two 9-inch sections and two 10-inch sections or two 11-inch sections and two 8-inch sections.
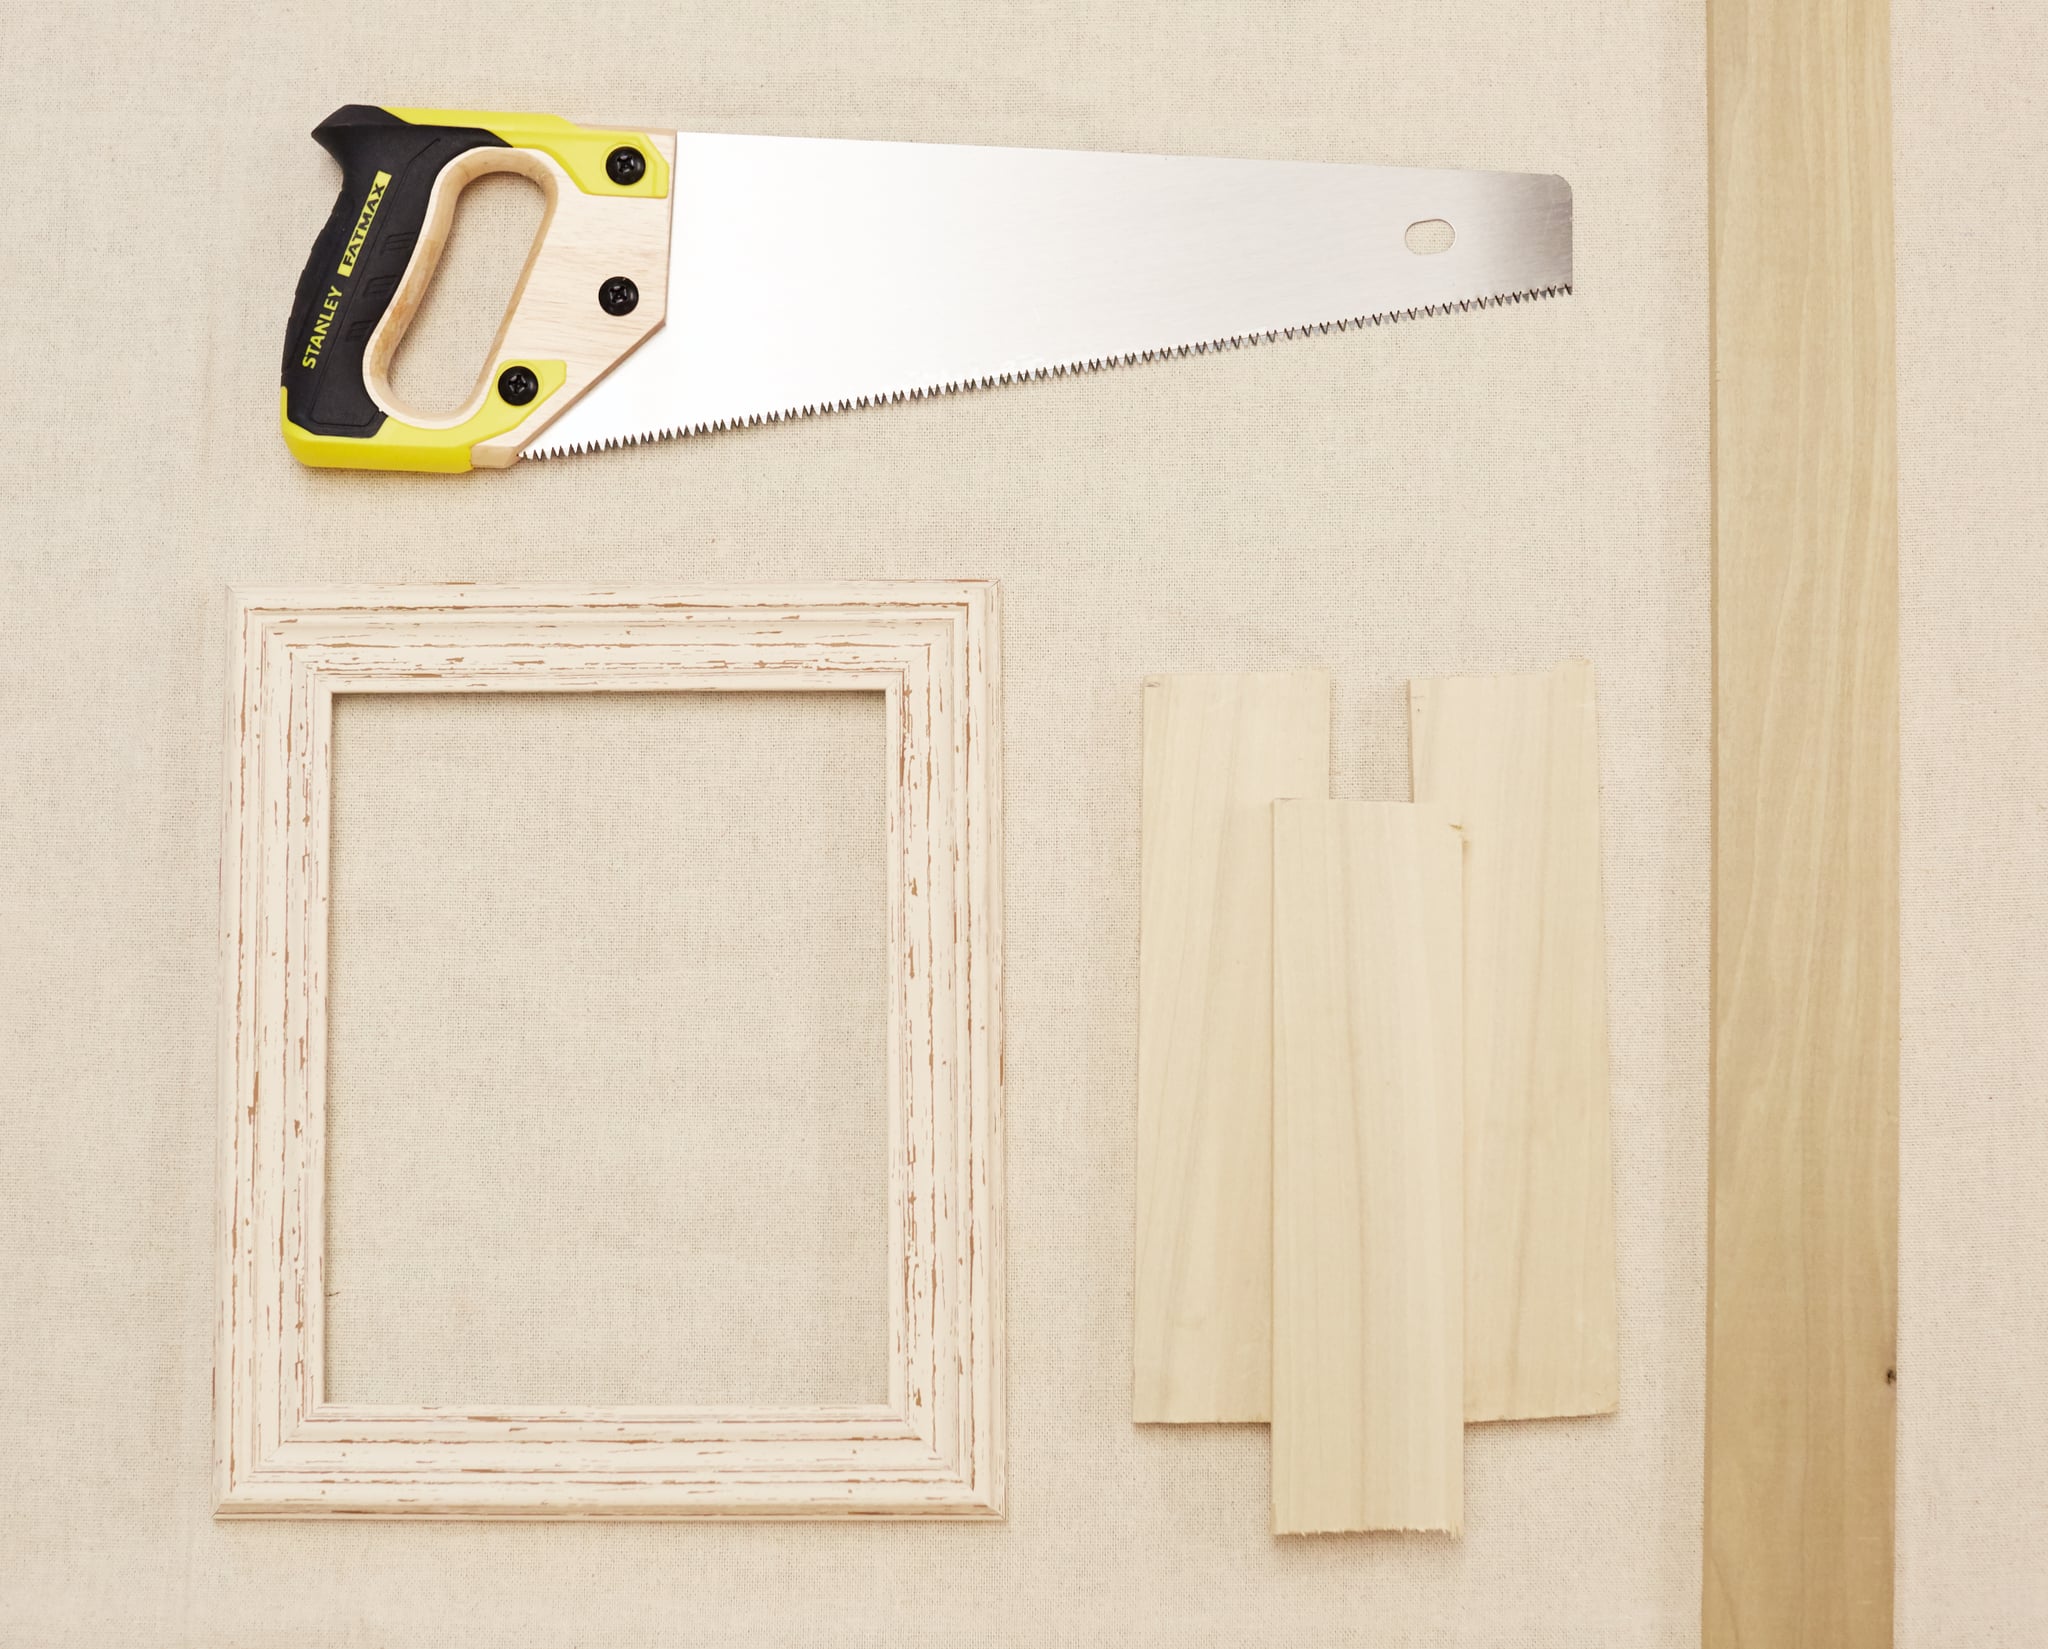
Image Source: POPSUGAR Photography / Diggy Lloyd
- Use two nails at each corner to secure the wood pieces together and create the box. Then smooth the edges with sandpaper.
- Take the frame and wooden box outdoors or to a well-ventilated area and coat with the spray paint. Wait at least 30 minutes, then flip to coat the other side. Touch up as needed.

Image Source: POPSUGAR Photography / Diggy Lloyd
- Place the wood box on your work surface and make a thin line of wood glue along the top edges. Then place the frame on the glue, moving as needed so the edges of the frame line up with the inside of the box. Let dry for one hour before the next step.

Image Source: POPSUGAR Photography / Diggy Lloyd
- If the picture frame is wide enough, secure the box using corner braces. Otherwise, run another line of wood glue around the outside edges of the picture frame and let dry before hanging.
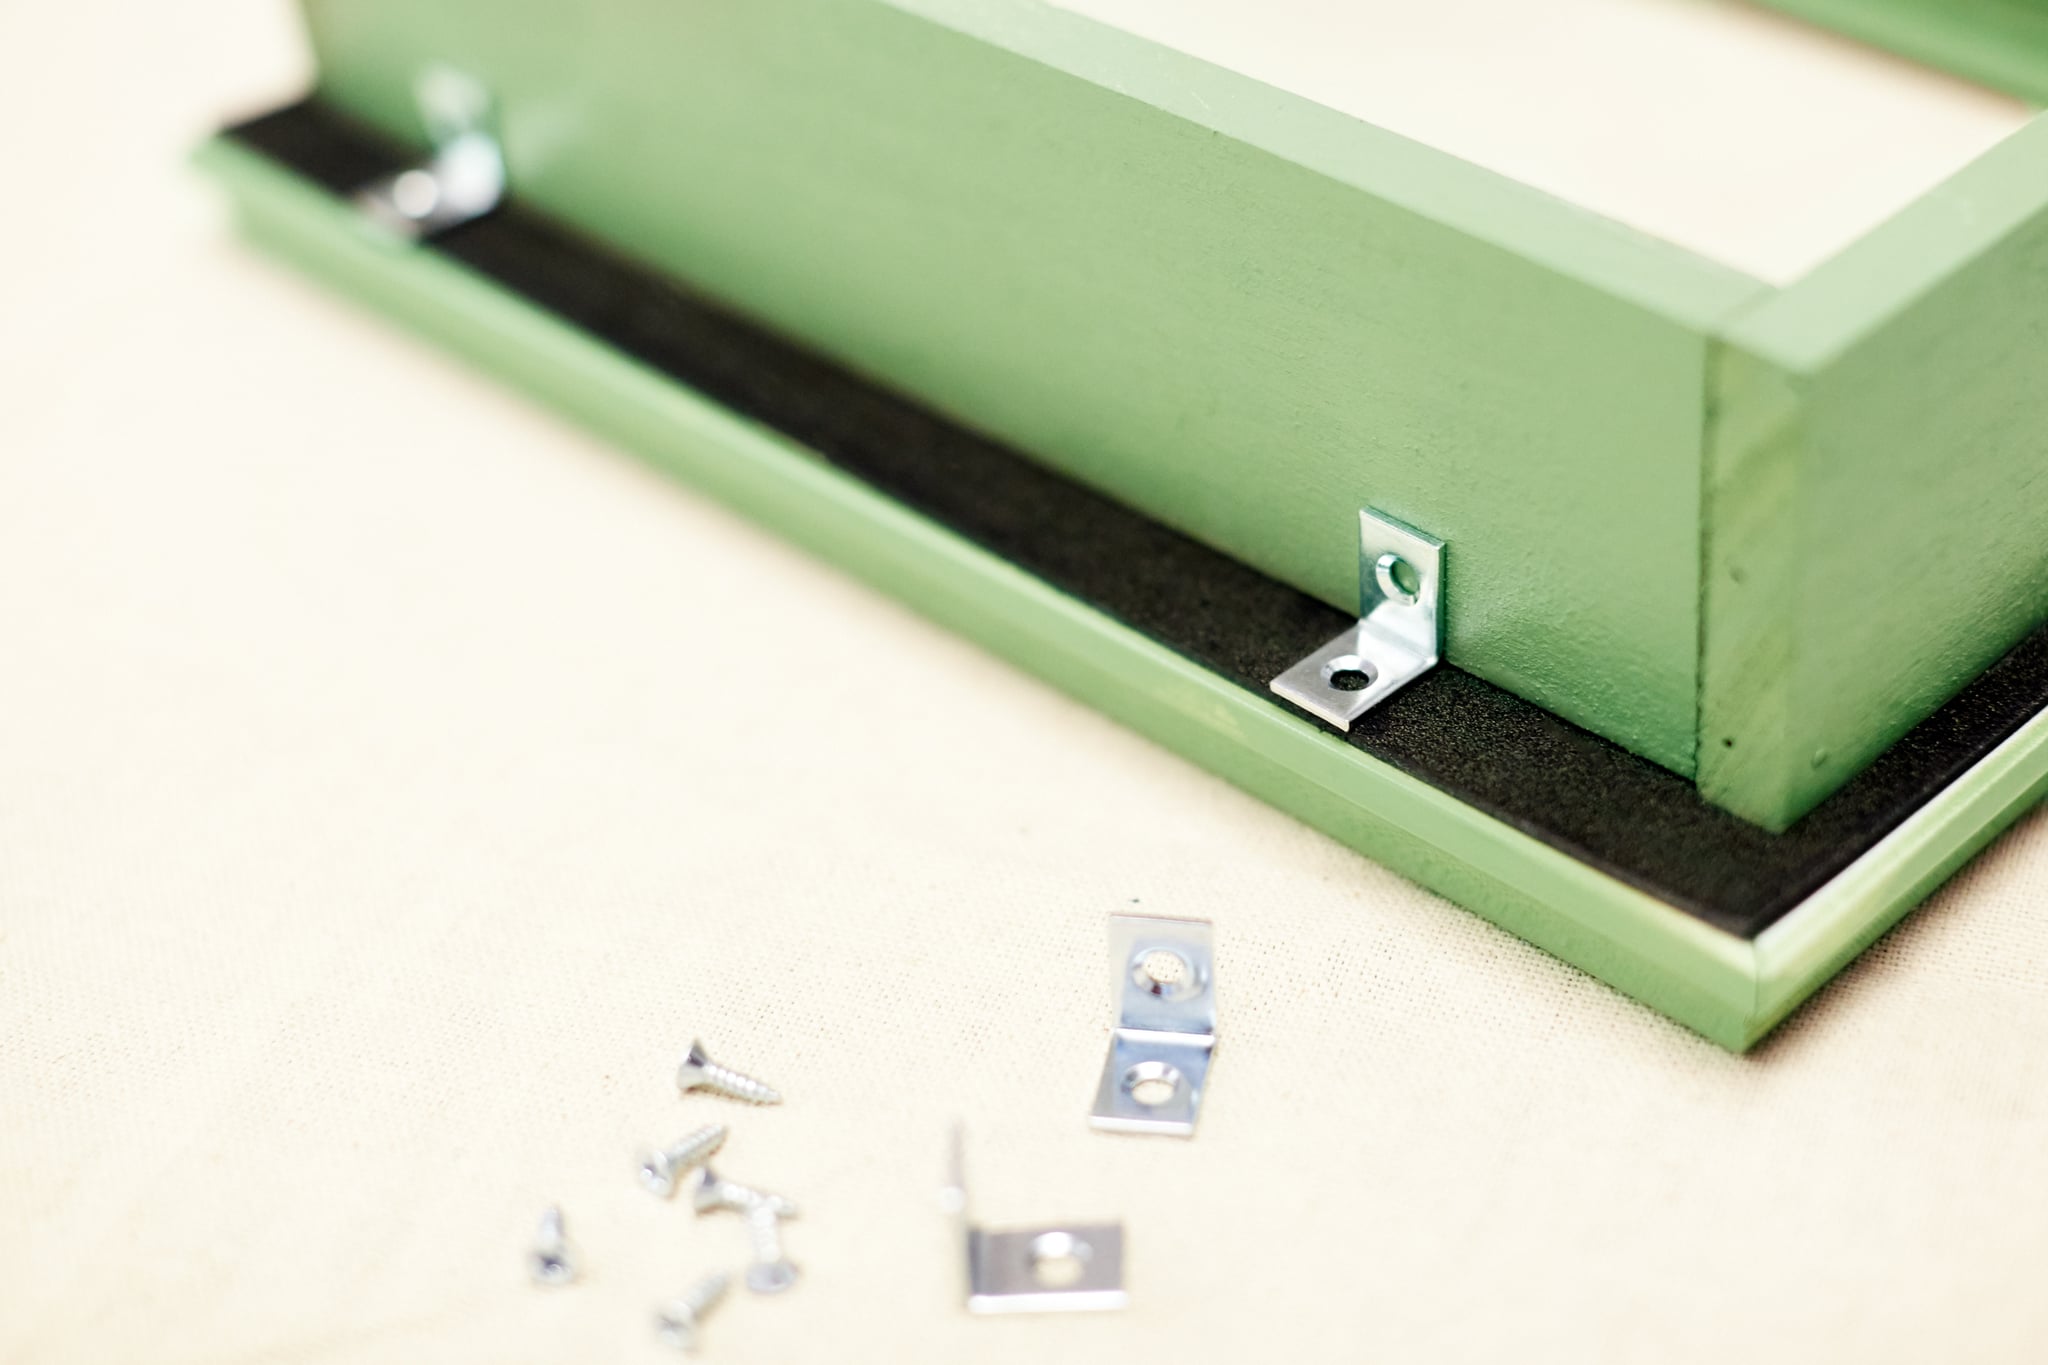
Image Source: POPSUGAR Photography / Diggy Lloyd
Arrange alongside other frames and decor touches that accent the color. We used a sage-hued spray paint, which plays beautifully against greenery and metallic touches. Elevate your space with a N°2. Bright™ candle from the new Glade® brand Atmosphere Collection™ that infuses the area and brings everything together.
More from Glade® brand:
Defy gravity just because with notes of sweet pea and pear in N°2 Bright™ from the new Glade® Atmosphere Collection™.