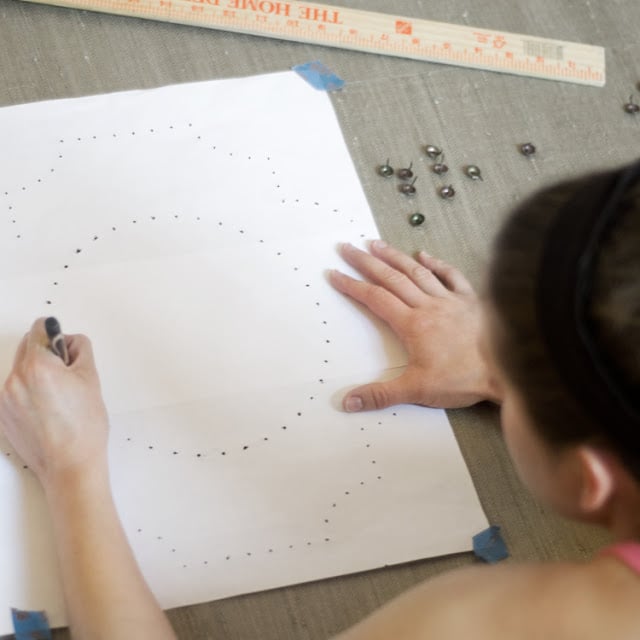
For the design, I was inspired by this fantastic headboard by Annie Selke. We created the design in Illustrator, and calculated the distance between the nailhead and printed it on two sheets of 11x17 which were taped together (You can download our version HERE, print on two sheets of 11x17 — design overlaps so use the extra design to help line it up before taping). We then punched little holes through the dots and used a felt tip pen to lay it out on the wallpaper.
Nailhead isn't the most fun thing to apply, but once you hit a rhythm you move pretty fast! Here are a few tips that I found helpful as I went. 1. To help protect my fingers from the hammer and to grab the nailhead more easily, I used rubber finger tips on my thumb and index finger (you know the ones that they sell in the office supply stores for sorting paper and such?) When I did hit my fingers, it hurt a lot less, and they weren't even sore when I was done! 2. If your wood is soft enough, push a few in with your finger first and then hammer. This saves time since you are putting the hammer up and down less frequently. Since our plywood was soft and hard in different spots, this wasn't always possible, but it helped when we could! 3. Lastly, this feature wall took about 2,000 nails. Wow, that's a lot of nails! So it was helpful to have two people or if you have the time, break it up over a few days. Total install time for the nailhead with two people was about 8 hrs.
We installed the trim (we painted first) before the nailhead reached the edge, so we knew exactly where to stop it. We used finish nails to secure the trim and then filled the holes with wood filler, sanded and painted once dry.
Next, we decided that we wanted the wall to sit just above the trim, so we cut legs to height out of a 1x12 and secured it to the back frame. We then installed a few cabinet anchors through the trim into the wall to make sure that it was firmly attached.
This wall was pretty massive! Almost the length of the room, but I LOVE the impact that it has on the space! Just because we are renting doesn't mean that without a little creative thinking we can't have a statement wall!