Champagne Mimosa Fruit Gushers
Make Your Own Boozy Fruit Gushers Filled With Champagne!
Gushers were my favorite treat when I was a kid. I loved the chewy, fruity snack with the burst of juicy fruity center. One bag was never enough for me! Well now that I'm an adult, who says that Gushers are only for kids? Why not let the adults have some fun too? These Champagne mimosa fruit Gushers are packed with orange citrus flavor, sparkling with sweet Champagne bubbles, and too good to stop at just one!
Champagne Mimosa Fruit Gushers
Chrystal Baker, POPSUGAR Food

Ingredients
- 1/4 cup orange juice
1/2 teaspoon unflavored gelatin
2 tablespoons light corn syrup
1/3 cup Champagne
6 sheets orange fruit leather candy
- Special equipment:
Silicone gem mold
Biscuit cutters
Cooking torch
Directions
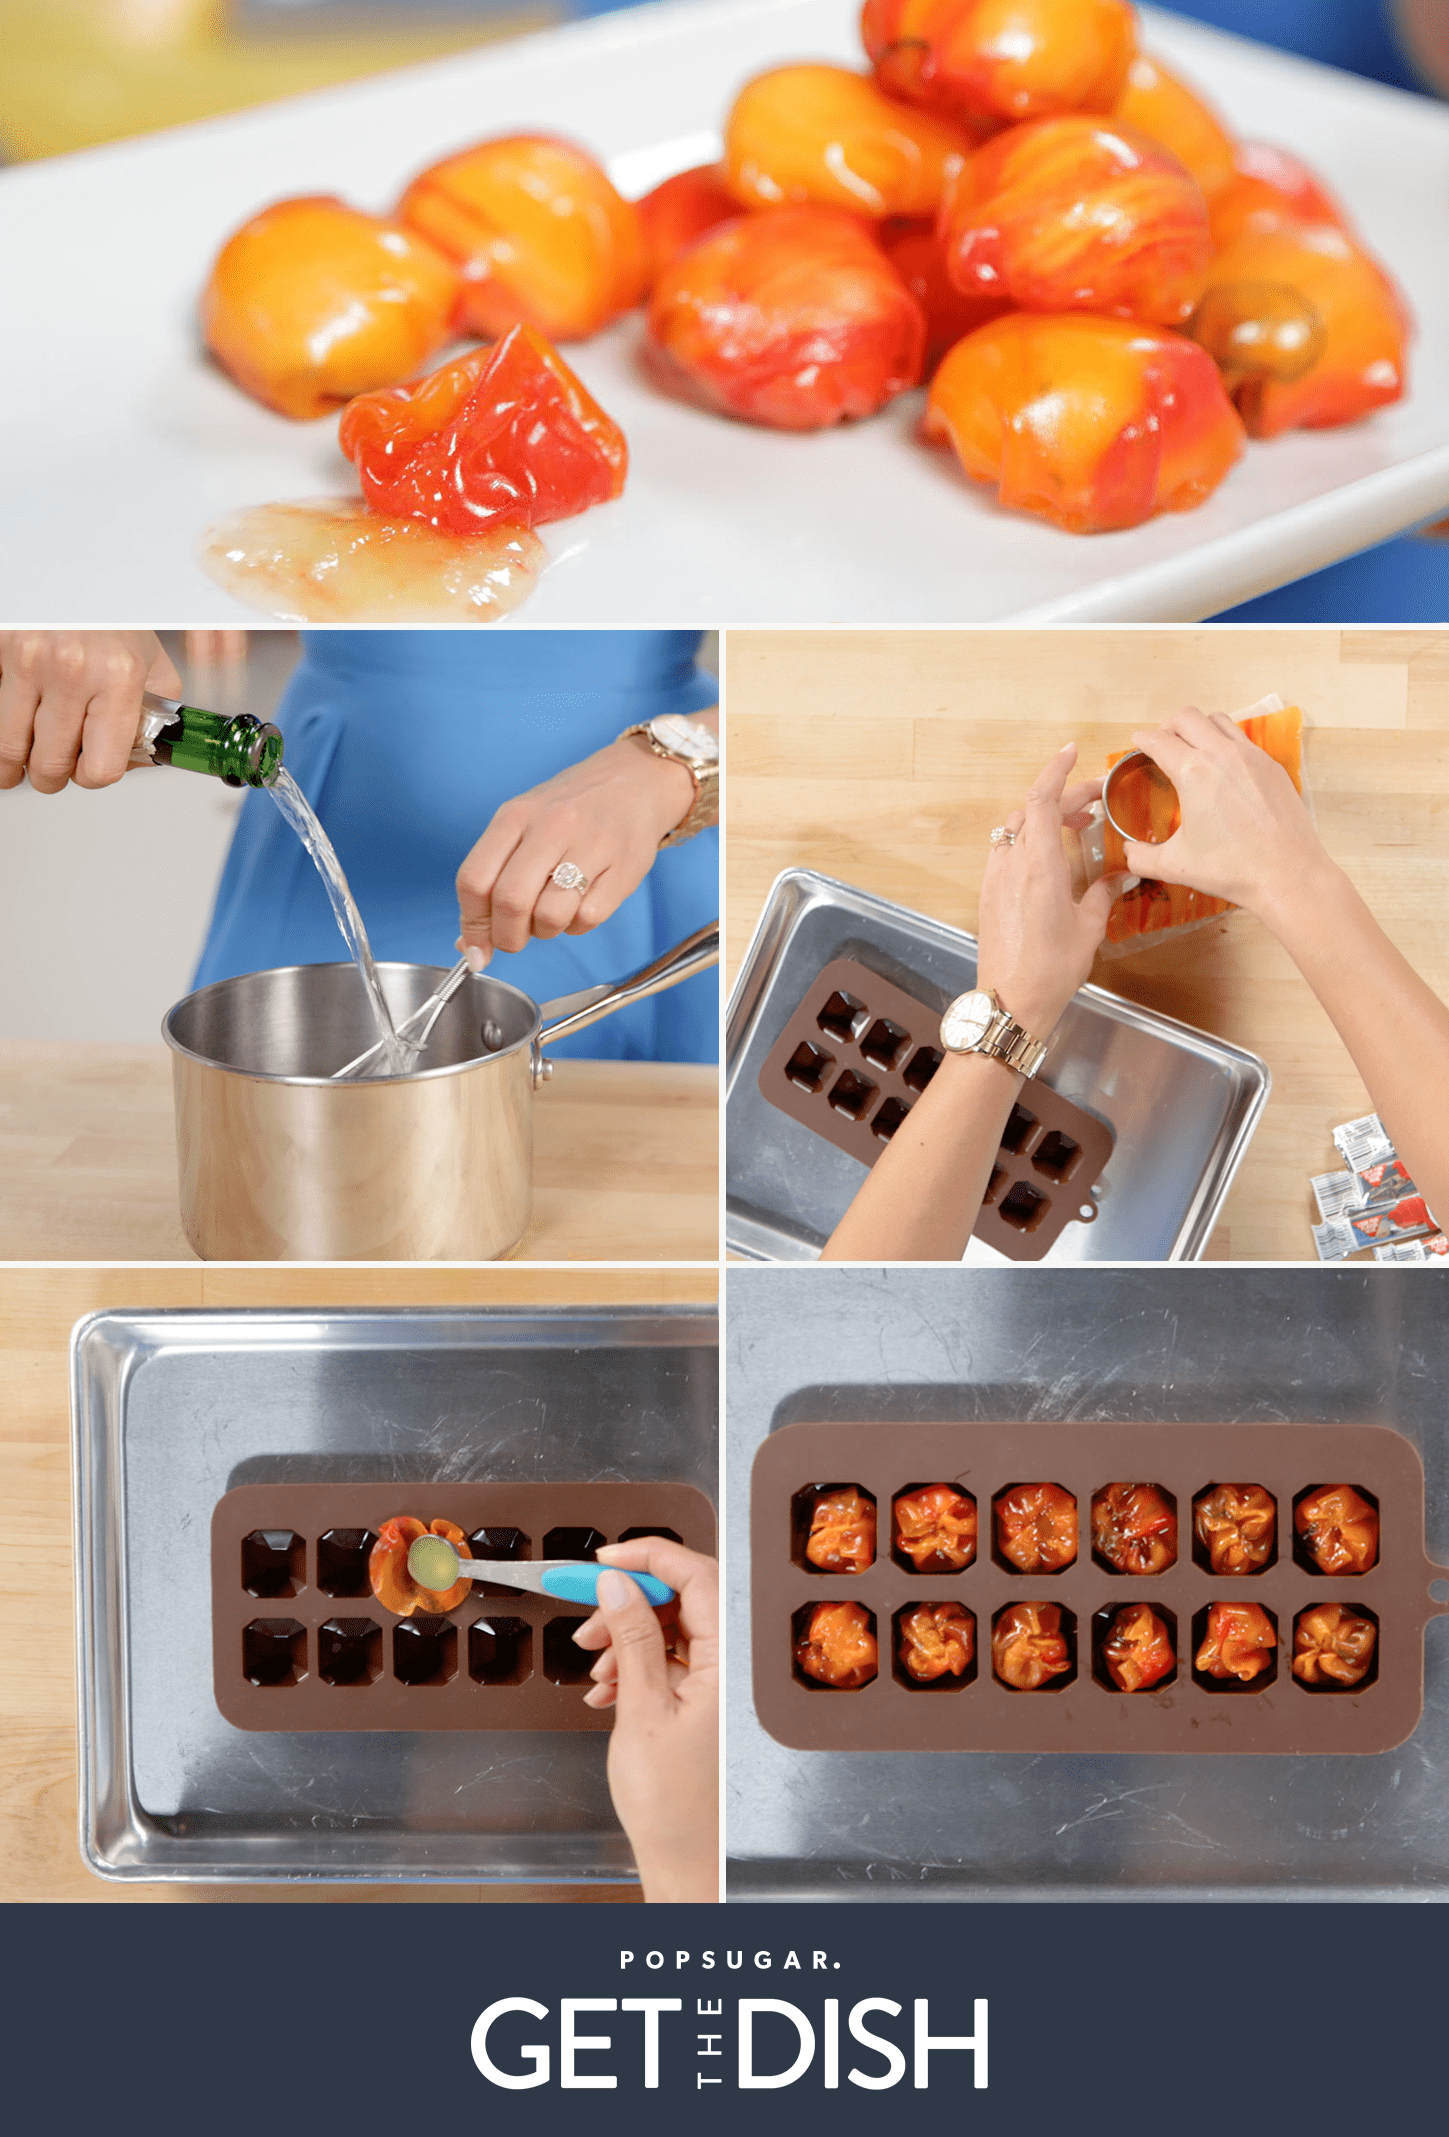
- To make filling: Into a saucepan over medium heat, add orange juice and simmer for 2 minutes. Remove from heat and slowly whisk in the gelatin in small increments until blended completely. Whisk in the light corn syrup and Champagne until thoroughly combined. Pour mixture into a bowl and refrigerate for 2 hours.
- To make candies: Unroll fruit leather candy and cut 12 large circles and 12 smaller circles using biscuit cutters. You want the large circles to fill the inside of the mold with a little hanging over the sides, and the small circles to be about the same size as the opening of the mold. Cover candy with plastic wrap while waiting to work with it to prevent it from drying out.
- Press the large circles into the mold, making sure to cover the bottom and the sides by firmly pressing and smoothing your fingers, or using the blunt end of a kitchen tool. There will be a tiny bit of overhang along the sides. Place the mold onto a small sheet tray to make it easier to move.
- Remove the filling from the refrigerator and whisk vigorously to loosen. The consistency will be similar to a slightly melted Jello. Drop about 1/2-3/4 teaspoon of the gel filling into the well of each mold, just enough to reach below the edge of the mold. Top each candy with the smaller circle and press the edges together firmly. Tweezers might help at this point if you need them.
- Use a mini cooking torch with a very low flame to melt the seams of the candy together. Quickly pass the flame over the edge like an airbrush, and then while the candy is still warm, press the edges together to seal completely.
- Place the entire tray of candies into the freezer for 4-5 minutes to solidify. Remove the candies from the mold and enjoy immediately.
Information
- Category
- Snacks
- Cuisine
- North American
- Yield
- 12 candies
- Total Time
- 2 hours, 29 minutes, 59 seconds


